Bitten By The Bug blog hop - phone challenge

Happy Monday and welcome to our monthly Bitten By The Bug Blog Hop! Now if you have made it here from the blog of the awesomely talented Krista, then you are on the right track! This week our challenge was issued by the fabulously talented Regina, and she asked us to use this cute phone cut from the From My Kitchen cartridge. As soon as I heard the challenge was this phone, the Christmas song "Santa Baby" came into my head, so that's what I decided on. I took the line "Santa Baby...forgot to mention one little thing...a ring....I don't mean on the phone. Santa Baby, hurry down the chimney tonight!" LOVE that song! LOL! I just used scrap paper for the card along with Bazzil cardstock. All the pieces were cut out with my Gypsy that I got from Hallmark Scrapbook. I'm telling you, it is sooooo awesome not to have to dig through cartridges and change them out! Talk about a time saver! And anything that saves me time is a HUGE friend of mine! The frame the phone is sitting on is cut from the Gypsy Wanderings cart that comes loaded on the Gypsy. The word bubble is from George. I also used a Martha Stewart border punch and some faux stitching.

Now for the fun stuff, the blog candy! I am giving away an assortment of stamped images, including some images from Magnolia-licious , Wags N Whiskers, High Hopes, Belles and Whistles, and even some from the highly sought after Hanglar and Stanglar! You will also receive an assortment of charms, and that's STILL not all! You will also receive a set of cut outs (your choice) from Peggy Loves Vintage! Talk about being able to knock out some fast Christmas cards! Just use the awesome Christmas images from Peggy Loves Vintage, and you'll be done before you know it! All you have to do to win is leave a comment on this post before Midnight Friday night, Dec 3rd. That should allow you to receive it in plenty time to make some Christmas cards with your goodies.

Ok, so that's it for me today. Now you're going to head to the most infamous Donna's blog, and check out her fabulous creation for today's hop! I'm telling you, I sure wish I could make my Design Studio and Cricut sing the way this girl can. She makes the most awesome creations ever!!! Don't forget, if you get lost along the way during the hop, just pop back over to Bitten By the Bug to get back on track. Thanks so much for stopping by to see me today, and hope to see you back again soon! HUGS!
Flavor-of-the-Month . . . Goin' Retro


For our "traditions" theme, I wanted to share with you guys this very retro Jell-O salad that my mom had on the table at Thanksgiving when we were growing up. Every year, my plate was filled with my dad's smoked turkey, mom's cornbread dressing and this salad.

It's really pretty and a kid-pleaser, too.

I tried to scan my mom's recipe card, but our scanner (despite much yelling and bad language on my part) is not cooperating. So...here is mom's recipe...

Strawberry Creme Squares

2 (3 oz) pkgs. strawberry-banana Jell-O
2 c. boiling water
2 (10 oz) pkgs sliced frozen strawberries (I could only find sliced in syrup, that's ok)
1 (13 oz) can crushed pineapple (only able to find 8 oz, so I guesstimated w/ 2 cans)
1 (8 oz) container sour cream


Dissolve jello in boiling water.


{Don't you love that RED?!?}
Add the frozen strawberries and stir occasionally until thawed. Stir in the pineapple.

Pour half of the mixture into an 8 or 9" square pan. Chill until firm.

Gently, spread with sour cream. (I used an offset spatula....I don't know how mom did it without!)

Spoon on remaining strawberry mixture instead of pouring so that it won't mix with the sour cream. Chill until firm.

{Pls ignore those floury fingerprints on the pan...I guess I was multi-tasking while taking pictures!}


I took a poll on Twitter and December's Flavor-of-the-Month will be...
Cookies!
Share any cookie: decorated, drop, bars, filled...you name it!

{As always, anyone is welcome to link to Flavor-of-the-Month; you don't have to ask. Click here to read through all of the previous posts for instructions.}


Ready to link up? I'll keep the linky open through December 2nd, then close it to avoid spammers.

Thanks for participating...wow...November was so much fun! I loved reading EACH and EVERY one of those pumpkin recipes!!!

Sweet Potato Pancakes


At our house, we eat these a lot as breakfast for dinner. For years, I told my son they were "fall pancakes" because I knew "sweet potato pancakes" wasn't going to go over so well. (He's 10 now, so he can handle the truth!)

Call them what you will...they are yummy!

These are made with canned sweet potatoes. They could certainly be made with fresh cooked & mashed sweet potatoes, but it makes me smile buying that can of Sugary Sam's. :)

Sweet Potato Pancakes


1 ¼ c. all purpose flour
¼ c. chopped pecans, toasted
2 ¼ tsp baking powder
½ tsp cinnamon
¼ tsp ginger
1/8 tsp freshly grated nutmeg
1/8 tsp allspice
¼ tsp coarse salt
1 c. buttermilk (or regular milk)
¼ c. packed dark brown sugar
1 TBSP vegetable oil
2 eggs
1 tsp vanilla extract
1 (16 oz) can sweet potatoes, drained & mashed

Whisk together flour, 2 TBSP pecans, baking powder, spices and salt.

Combine milk through vanilla; add to the flour mixture. Stir until smooth. Stir in the mashed sweet potatoes.

Ladle about 1/4th cup batter for each pancake onto a non-stick griddle. Turn when edges are cooked and top is covered with bubbles.

Top with maple syrup....

...and maybe a little more syrup...

and sprinkle with remainder of pecans.


Related posts:

Flavor-of-the-Month link up is tomorrow, November 30th!

Magnolia Christmas frame card with Waiting Tilda and Martha Stewart border

Happy Saturday everyone! Hope all my friends in the US had a wonderful Thanksgiving! And for those of you that ventured out yesterday in seach of the perfect bargain, I hope it worked out for you! Me? Nope, I don't even touch Black Friday. I have to get up for work every week day at 4:30, there's no way I'm getting up that early on a day off. LOL! My sleep is worth more to me than the bargain I might find out there. Now onto my card, this was so much fun and easier than I thought it would be, and I totally love the effect. So I will be making more of these frame cards, that's for sure! I first saw it over on Dawny's blog for our Papertake Weekly challenge and fell in love with hers, and I was lucky enough to have the day off, so I could immediately start on one of these frame cards. You can find the pictorial on how to make one yourelf right HERE. It was put together by our very own talented Claudia for a previous Patertake Weekly Challenge.

I tried so hard to show you the dimension of this with the camera, but I really couldn't capture it very well. The Magnolia house is in a frame that is recessed a full 1/2" from the front of the card. The effect in real life is awesome! I used three different Magnolia stamps which came from Magnolia-licious. I used Waiting Tilda, Large Sled, and #9 house. They're colored with Copic markers and then cut out. The DP is Basic Grey and cardstock is Bazzil. On the house, I added some liquid applicque and some beads for some sparkle. Around the edge of the frame, I added a border made with a Martha Stewart punch, and in the corners, I hid the meeting points with a MS snowflake punch adorned with a Kaiser pearl.

I hope you enjoy this card as much as I enjoyed making it, and I'd love it if you would try one for yourself. Thanks so much for stopping by to see me today and hope to see you back again soon! Big hugs!

Wags N Whiskers Challenge #4

Good morning and happy Friday! This week went WAY too fast for me as I had the week off. Now it's back to reality and work on Monday. Oh well...it let's me buy more playthings, right? With today being Friday, that means it's time for a new challenge at the Wags N Whiskers challenge blog. This week, the challenge is from the awesomely talented Jeanette, and she is asking us to use traditional Christmas colors. I chose to use this adorable stamp, Zoe and Gemma's Snow Fun. Isn't it adorable?? And she' available right now at Wags N Whiskers!


The quality of these stamps are truly remarkable!!! The deep etched rubber makes a fabulous impression! I stamped it with Memento ink and then colored it with Copic markers (pic below for markers used). I also used some white fun fluff on the hats and the snow. I love adding fun texture to my cards, and the grandkids love the feel of it too. I also used a word circle stamp from The Cutting Cafe' called Merry Christmas. It's a huge word circle that comes with different sayings to put inside it. I down sized it just a bit to make it fit the way I wanted to. That's the amazing thing about Regina's digital images. You can resize them to whatever you need for the moment. I love it!!! I just used the outside word circle this time, and cut it out with circle Nestabilities.

Added a nice big red silk bow along with a gorgeous snowflake charm that came from Lacey at Stamp and Create. Oh, and I used one of my new Martha Stewart border punches. Isn't it cool looking? The papers I used are Basic Grey and the cardstock is Bazzil.


That's about it for this card! Please be sure and join us over at the Wags N Whiskers challenge blog and play along with us! The only stipulation is that you must use a Wags N Whiskers image to win. So if you don't have any of the images yet, then what in the heck are you waiting for?? Just go HERE and have fun shopping! Thanks so much for stopping by to see me today, and hope to see you back again soon!!! HUGS!

Little Pumpkin


I've made lots of what I call "baby face" cookies over the past several years....


In the back of my mind, I've always wanted to make a "little pumpkin" version. (As a matter of fact, I just tried to talk someone into them a few weeks ago for a fall baby shower.) :)

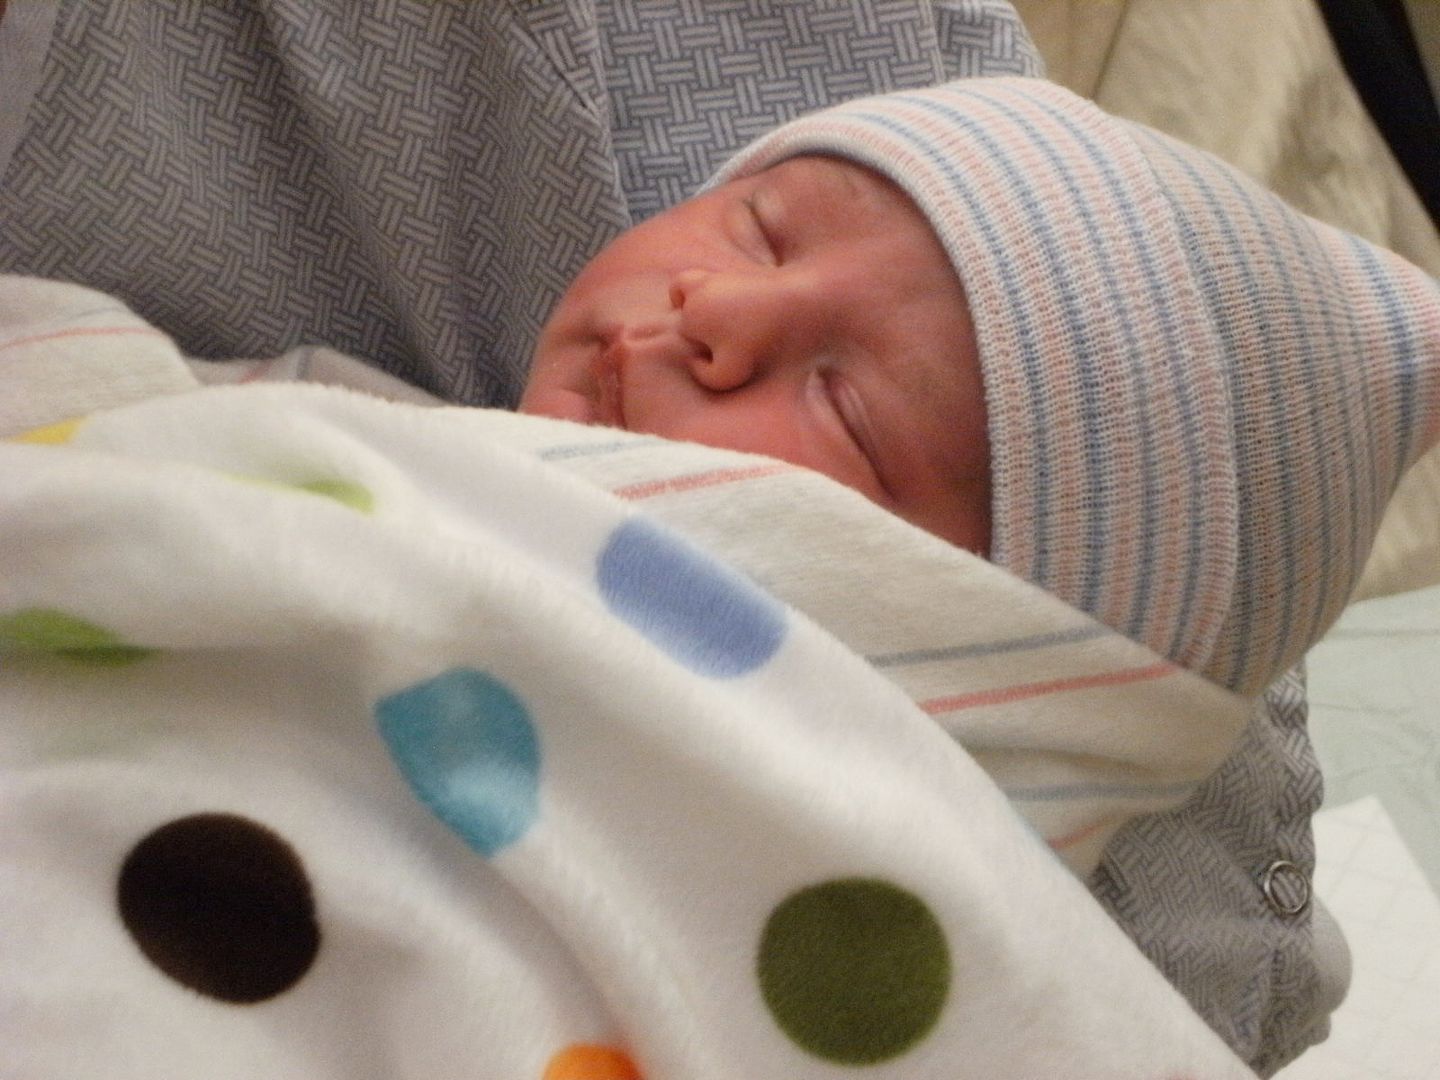
Well, my sister was kind enough to oblige me by having a baby on Wednesday!!! Isn't that nice?

Want to see him?

His name is Tony and he is the sweetest! He IS a little pumpkin!


I hope you all had a wonderful Thanksgiving! Ours was filled with new baby, family, lots of food and football. I am thankful to have a sweet new nephew and thankful for all of YOU. Thank you so much for joining me here on the blog!

Gluten-Free Pumpkin Scones with Maple Nutmeg Icing

Gluten-free pumpkin scones with maple icing are tender and delicious with tea
Gluten-free pumpkin scones with maple nutmeg icing.


Take a deep breath. Stop. Sit. I understand. I get it. And I know what you're craving. Because I'm craving it, too. After all the pre-Thanksgiving hubbub, after scouring the Internet for gluten-free recipes, after all the planning, the lists, the shopping at six different markets because one store never has everything you need (that would be too simple), the label reading, the patience (dug from somewhere deep and zen and maybe even vaguely transpersonal) to explain (again) why scraping the pumpkin filling off a wheat pie crust does not a gluten-free dessert make, what you crave (besides alone time with a freshly cracked book and your favorite mug filled to the brim with your beverage of choice) is something indulgent.

But not overly indulgent.

Read >>

Papertake Weekly

Hi everyone and happy Tuesday! Hope you're having a wonderful week, and to my friends in the US, If your anything like me, you're busy getting ready for a fiest on Thursday. For the Papertake Weekly challenge this week, the fabulous Dawny has asked us to make a favorite Christmas card, and it's being sponsored by the fabulous Simon Says Stamp!! I know I've said it before, but I truly love gingerbread peeps! It's one of my favorite holiday symbols. So when Regina over at The Cutting Cafe' came out with this ADORABLE cutting file Gingerbread Boy or Girl, I thought I was just going to jump through the roof! Is this not the cutest card??? And Regina makes it so easy for you! If you have a cutting machine, you can just use the wpc file and your machine will cut it right out. If you don't, just use your handy dandy pair of scissors and cut it out yourself. Either way, it makes the most adorable shaped card, don't you think?? I used Bazzil carstock for the base, PTI polka dot paper for the gingie, and more Bazzil for the decorations. The only thing I used that isn't included in the set is the Martha Stewart snowflake and a rain dot in the center of it. Oh, and a little ribbon too. So please pop over to Papertake Weekly and join in on the fun with us. You could win a fabulous prize from Simon Says Stamp. Thanks for stopping by to see me today, and hope to see you back again soon! HUGS!

Pumpkin Chocolate Chip Bars

I'm pretty sure Debby Boone was referring to pumpkin and chocolate when she sang, "It can't be wrong, when it feels so right..."

{My apologies to those of you in your 20's...you'll need to google it.} ;)

Because I can't get enough pumpkin and pumpkin season is about to end, I give you...

Pumpkin Chocolate Chip Bars
{recipe adapted from Everyday Food, Nov 2004}

2 c all-purpose flour (could use white whole wheat here)
1 & 1/2 tsp cinnamon
3/4 tsp ginger
1/2 tsp nutmeg
1/8 tsp allspice
1/8 tsp cloves
1 tsp baking soda
3/4 tsp coarse salt
1 c unsalted butter, room temp
1 & 1/4 c sugar
1 egg
2 tsp vanilla
1 c pumpkin puree
12 oz chocolate chips

Preheat oven to 350. Line bottom and side of 13x9" pan with foil, leaving an overhang on all sides.

Whisk together the flour, spices, baking soda and salt.

Cream together the butter and sugar on medium-high until smooth. Beat in the egg & vanilla. Beat in the pumpkin puree (it will look curdled...do not worry).

Add the dry ingredients and mix on low just until combined. Stir in the chocolate chips.

Using an offset spatula (or the back of a spoon), spread the batter into the prepared pan. Bake for about 35-40 minutes or until a toothpick comes out clean (or with a few crumbs, not batter). Cool completely in the pan.

Lift the bars from the pan using the foil. Peel off the foil and cut into squares.

{They are delicious!!!}

Alright...bring on the gingerbread!!!


Related posts:
T6EHD3DQN6AZ

BBTB - Cornucopia challenge

Well, the weekend is over and hope you had a fabulous one! And that means it's time to reveal a new challenge for Bitten By The Bug. This week, our hostess is the amazingly talented Donna Mundinger. If you have not visited Donna's blog, you are missing out! This girl is so talented with the Cricut and the Design Studio Software! She constantly amazes the heck out of me!! Well, this week, Donna challenged us to use the Cornucopia from Paper Doll Dress Up. Oh sheesh...the cornucopia...the horn of plenty.....Now.... no offense Donna, but I have always hated cornucopias. LOL! I don't know why, I just don't like them. And had it not been for this challenge, I would never have cut it. Never. LOL! So I did my best, but what can I say. I don't like it. I didn't want to do the typical fruit in it, so I played around a little, and of course the cornucopia represents things being "plentiful". So I wanted to with everyone a season full of love, So I filled mine with hearts.

Now even though I don't like the cornucopia, I have to say though, that I enjoyed the heck out of myself making it! Why?? Because this entire card was made using my brand new Gypsy!!! I'm so excited to have one of these machines that I can hardly stand it! So I've got most of my cartridges loaded onto it, and I am amazed at how much I love this little machine! No more searching through handbooks, no more changing cartridges. This thing is fantastic!!! And it's available right now over at Hallmark Scrapbook! The shaped card and the frames were cut using the Gypsy and A Child's Year cartridge. This is quickly becoming my favorite cart for frames. It's amazing! The hearts were cut using Plantin Schoolbook. The paper used was Basic Grey and cardstock is Bazzil. I got a little irked with the hearts cause I used a coordinating orangish paper from the same pack of Basic Grey, but for some reason, it photographed pinkish, and I could not photoshop it to the true color, no matter what I did. I used some white chalk ink around the edges of the black frames. That's it for this card. Simple, easy, and I'm really glad it's done. LOL! Please be sure and pop over to Bitten By The Bug to check out the fabulous creations by the rest of the team. Thanks so much for stopping by to see me today, and hope to see you back again soon! hugs!

You're Tea-riffic featuring 60's Magnolia Tilda

Happy Sunday everyone! Hope you're enjoying your weekend! This is one of the Magnolia-licious raining cards I sent out last month and never posted. Both of these stamps are from the Yummy For Your Tummy collection that is available right now at Magnolia-liciouss! I used #385 60's Tilda and #627 tea cup all colored with Copic markers. The circles were cut out with Nestabilities and I did some machine stitching as well as some faux stitching. I cut the hanger off the tea pot charm and glued it to the center of the word circle which was created on the computer. Added some silk ribbon with a big old button, and this one was done!

Thanks so much for stopping by to see me today, and hope to see you back again soon! Enjoy the rest of your weekend! HUGS!

WOOHOO!!! Wags N Whiskers !!!!!!

I get to share my exciting new with you now! WOO HOO!!! I was invited to join the design team for Wags N Whiskers! Can I just tell you how excited, honored, and humbled I was to receive that email from Lacey?? The design team they have put together is amazing, and I'm still pinching myself about being asked to join them! If you haven't seen this ADORABLE line of stamps, you've got to go check them out. It is a line of stamps designed after the children of the two co-owners of Wags N Whiskers stamps - Lacey Stephens and Nikki Fairbairn, and drawn by the fantastically talented Chrissy Armstrong. And oh my gosh, they are the cutest!!!! Now not only are Nikki and Lacey the co-owners, but they are also amazing crafters that I have followed and adored their work for a long time!! How lucky am I????

The challenge this week on the Wags N Whiskers challenge blog was issued by Nikki. She is asking everyone to use buttons along with your Wags N Whiskers stamp. For my debut card, I just HAD to choose this adorable stamp, Super Ryan. Isn't he CUTE?? He reminds me soooo much of my two oldest Grandsons, JJ and Chris! I colored him up with Copic markers (pic below) The DP is by 3bugs in a rug and cardstock is Bazzil. If you look close enough, you'll see I put a little border strip of stars on there (cause my Grandboys will always be the stars in my life), courtesy of Martha, and then I wrapped some PTI twine around a couple times before tying it off. The sentiment was cut from the DP and mounted on foam squares for dimension. The buttons were just from my stash.
That's it for my card today. Please do yourself a big favor and check out the FABULOUS creations the rest of the design team cooked up for you this week. Splendiferous talent, I'm tellin' ya! And then please go check out these adorable stamps! We would truly love it if you would join us at the challenge blog and link your Wags N Whiskers card. Thank you so much for stopping by to visit me today to help me celebrate my good news. I so appreciate all your support and comments. You are truly appreciated more than you will ever know, and your support really touches my heart. Happy Friday my friends, and I sure hope to see you back again soon! Big hugs!!

Roasted Acorn Squash Risotto

Acorn squash risotto recipe that is vegan and gluten free

A delicious acorn squash risotto that is vegan and gluten-free.

Looking for a perfect fall side dish? Or a vegetarian knock-your-socks-off bowl of creamy goodness? Risotto might fit the bill. This is one of my all-time recipe favorites. In fact, it was the first dish I turned to eight years ago when I discovered I had to live gluten-free.

Way back then (insert hazy slow-mo flashback) I would add freshly grated Parmesan to the cooked risotto. Shaved Reggiano, to be exact. But these casein-free dairy-free days I enjoy this risotto strictly vegan. No cheese. And guess what? I don't feel deprived. Seriously. The flavors hold their own without the whole moo cow cheesy thing.

In fact, this risotto is so creamy-good and comforting I only think one thing as I taste bite after velvety bite: How could anything so simple taste so unbelievably good? Well, that, and, Who the heck needs cheese or butter, anyway?


Read >>

Three Clovers Designs Thursday challenge

Happy Friday Eve everyone! And it's especially nice this week, cause I am on vacation next week! NINE glorious days off in a row (including weekends of course)! I can NOT wait to turn off my alarm Friday morning when I get up! LOL! Thursday also means a new challenge from Kerry at Three Clovers Designs. This week, she is requesting a Christmas card that has no red or green. I used this adorable digi image by CC Designs. Isn't she cute??? She's colored with Copic markers and then cut out with oval Nestabilities. See that flower? I made it myself with the Blossom Nestabilities. What do you think? I think I need a lot of practice, but I also think it's not too awful bad considering it's my first attempt. :) I didn't notice until now that the snowflake charm was twisted in the pic. Dang!!!

The snowflakes and fronds are from Martha Stewart punches and the paper is Basic Grey Eskimo Kisses. I also used some Stickles on her wings and hat. The pink pearls are by Kaiser.
That's it for today. Please be sure and visit Three Clovers Designs to check out all the other fabulous projects from the rest of the team. And we'd love it if you would join in the fun and create your own card and link it to Kerry! Thanks so much for visiting me today, and please pop by tomorrow. I've got a bit of really exciting news to share with you, but can't reveal it til then!!! HUGS!
OOPS! Almost forgot to say this card fits into Danni's Flutter by Wednesday challenge!

Brown Sugar and Spice Cut-out Cookies


I don't mess with my cookie recipe much. Sometimes, I change up the extracts or add vanilla bean paste, but usually I stick with what works.

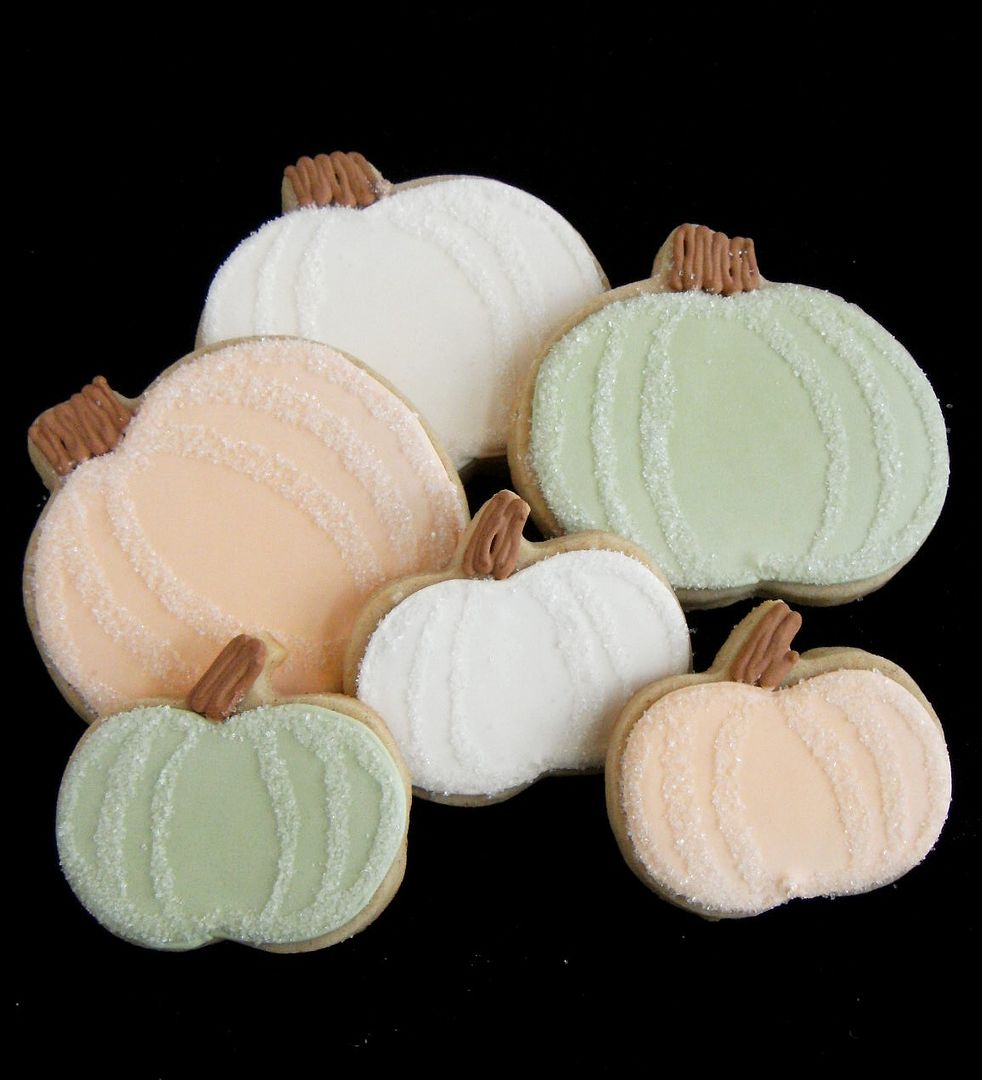
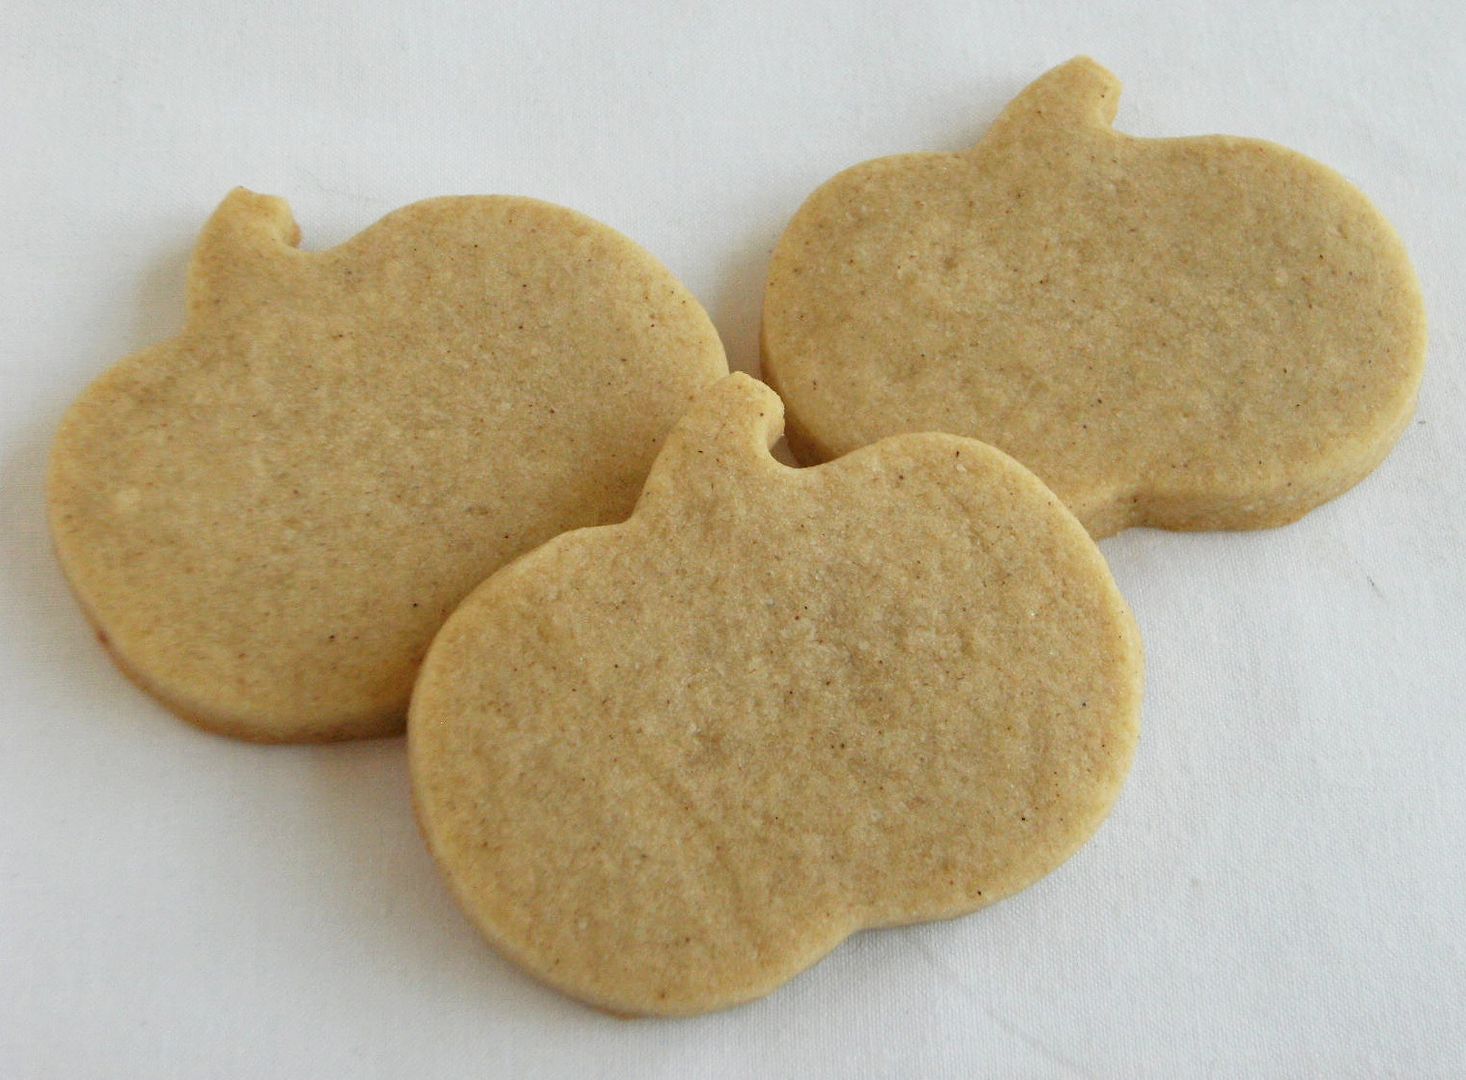
Fall spices were calling to me, though, and I thought I'd try to use them in a cut-out cookie. It worked!!! These cookies are lightly spiced with cinnamon, nutmeg, ginger and allspice. I replaced half with sugar with light brown sugar. The cookies ended up slightly softer, but still sturdy enough for decorating.


If you're making cookies for Thanksgiving, these are perfect!

Brown Sugar and Spice Cookies

3 c unbleached, all-purpose flour
2 tsp baking powder
1/2 tsp cinnamon
1/4 tsp ginger
1/8 tsp nutmeg (freshly grated, if possible)
1/8 tsp allspice
1/2 c granulated sugar (I use sugar that I've stored vanilla beans in)
1/2 c light brown sugar (packed)
2 sticks butter
1 egg
1 tsp pure vanilla extract


Preheat oven to 350.

Whisk the flour, baking powder and spices, set aside.

Cream the sugar and butter. Add the egg and extracts and mix until well-blended.

Gradually add the flour mixture and beat just until combined, scraping down the bowl, especially the bottom. (The dough will be quite thick...you may need to knead in stray bits of flour from the bottom of the bowl by hand.)

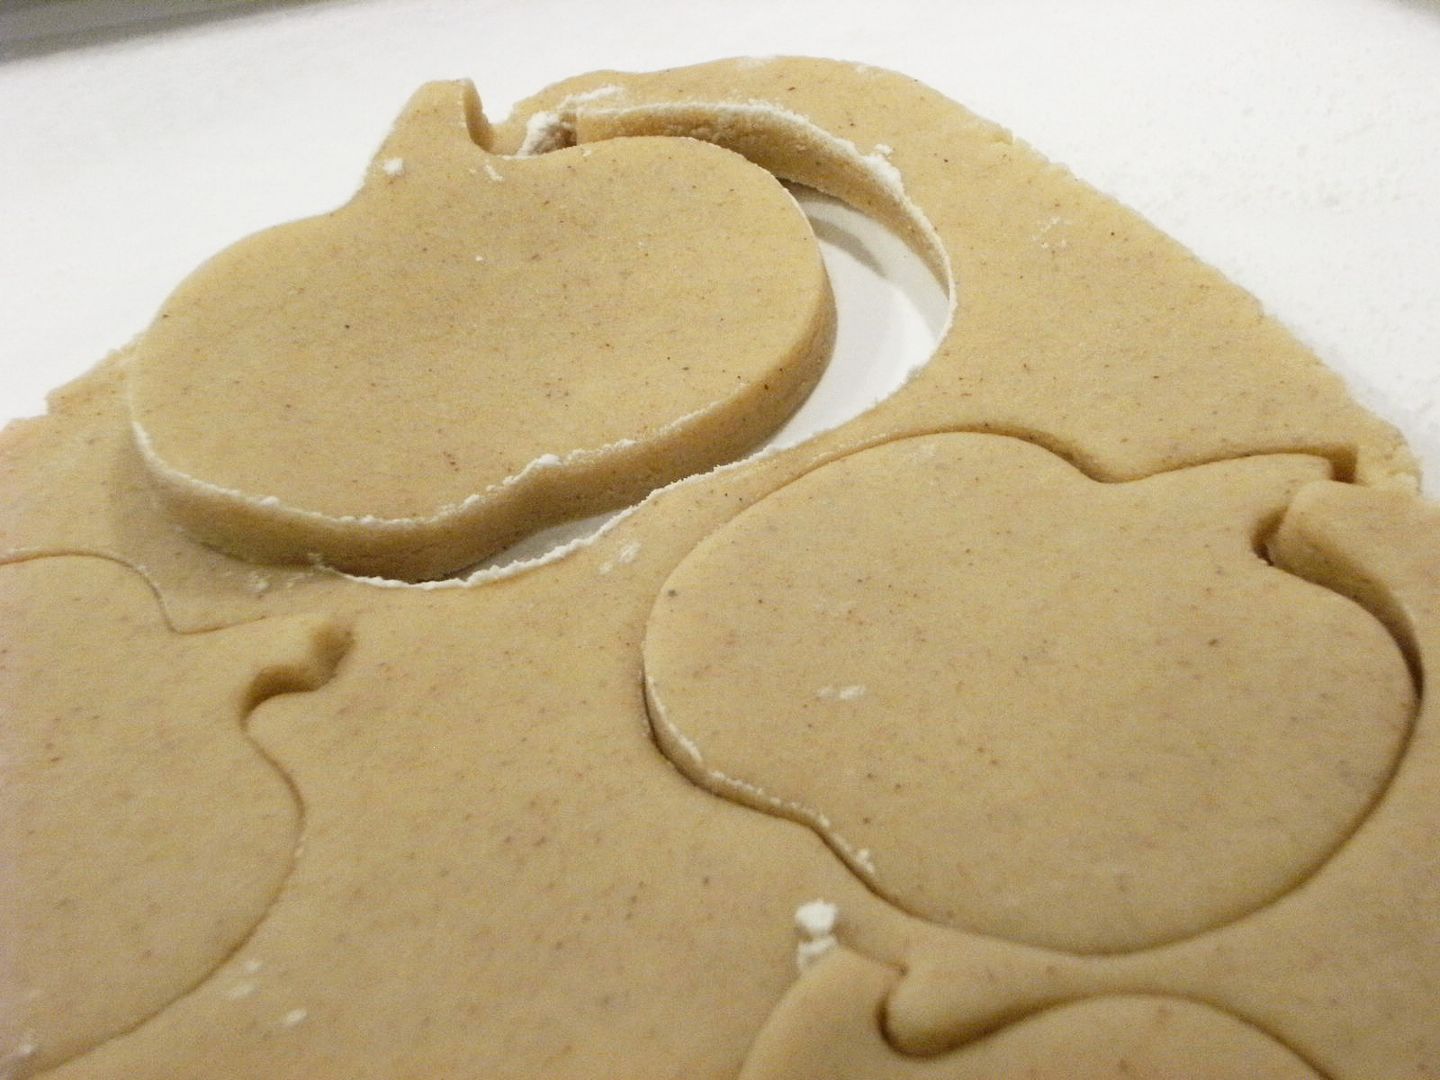
Roll on a floured surface and cut into shapes. Place on parchment lined baking sheets and bake for 9-12 minutes, depending on the size of your cutter. Let sit a few minutes on the sheet, then transfer to a cooling rack.


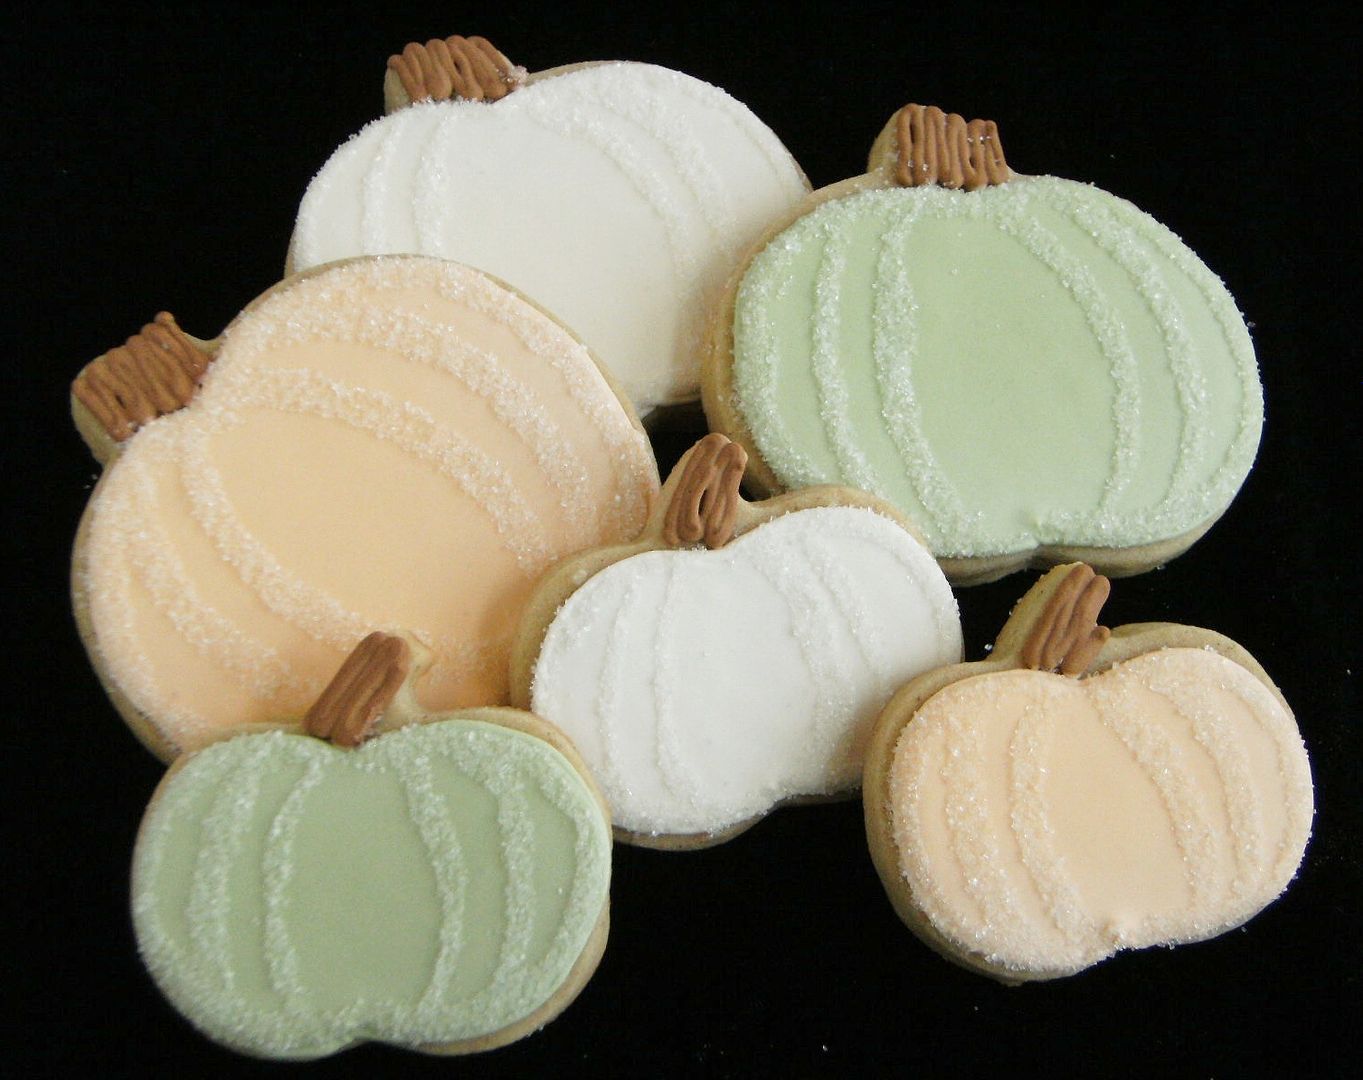
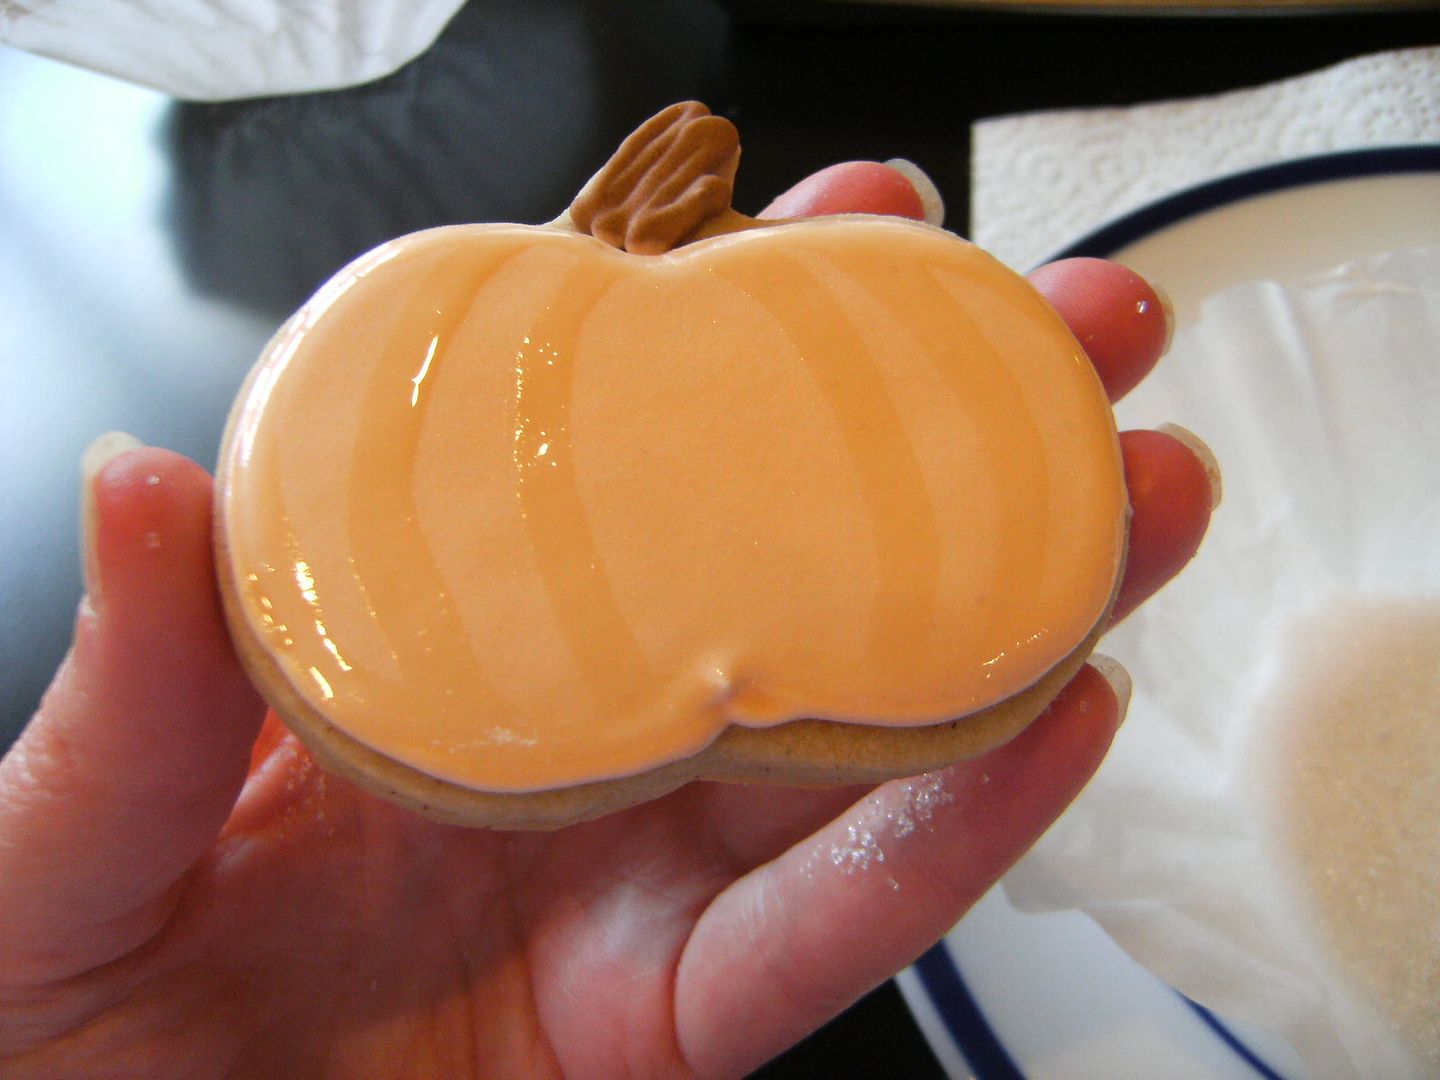
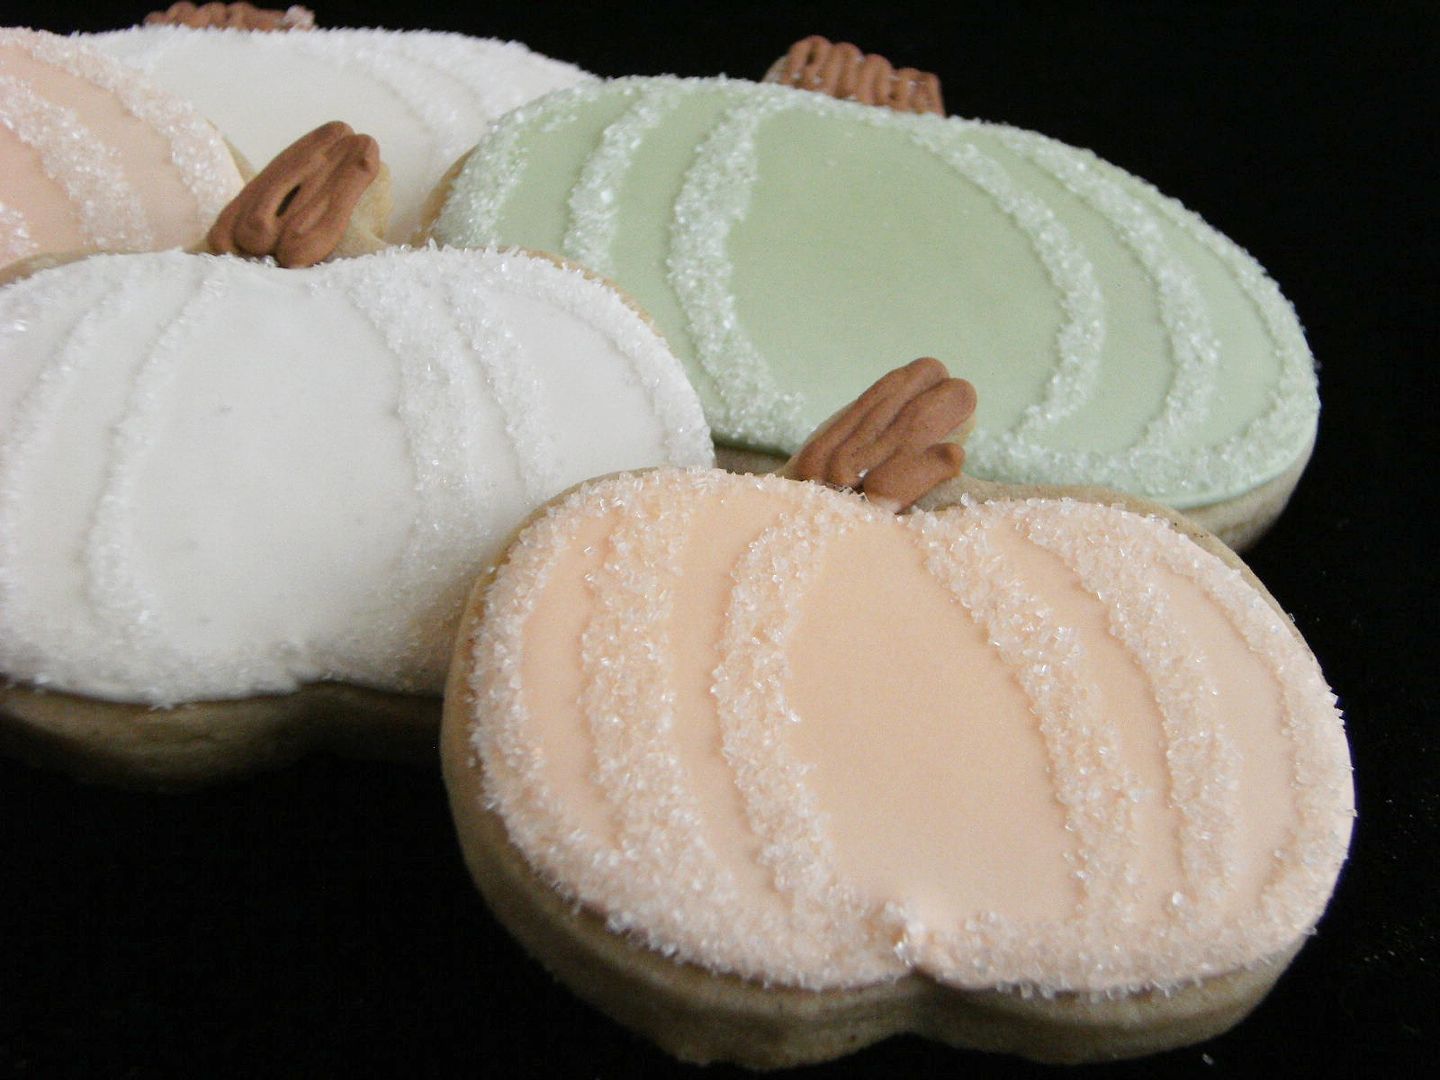
To decorate these cookies, I used pale green, ivory and light orange for the pumpkins. After being outlined and filled, they dried completely overnight.


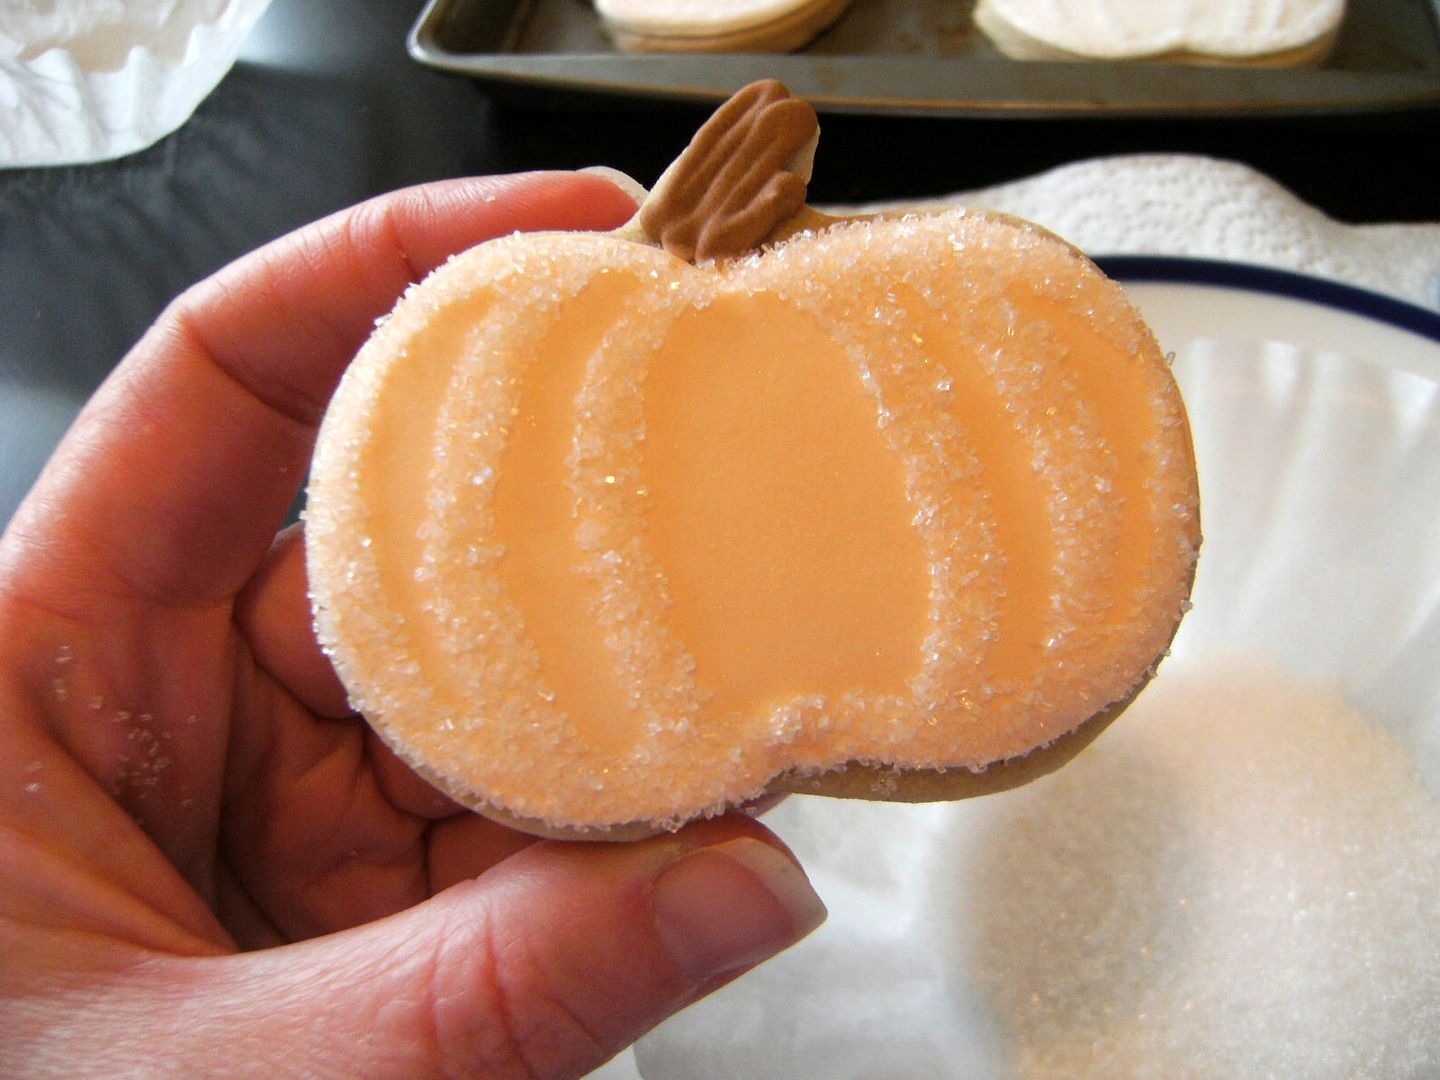
For the sparkly accents, mix a small amount of meringue powder with water. With a child's paintbrush, paint the area you would like to be sparkle-d (that's a word, right?).


Then, shake on sanding sugar all over the cookie. Turn the cookie upside down and shake off the excess. (I do this over a basket coffee filter and use that to funnel the extra back into the container.)

These are waiting in the freezer to be donated on Thanksgiving for Drop In & Decorate. Are you making some, too? If so, I'd love to have pictures and details of where and how many cookies you donated by December 10th. Thank you!


OH...and did you guess? I have 221 cookie cutters. :)


Related posts:
 
design by 100 HOTTEST CELEBRITY COUPLES OF 2011