Flavor-of-the-Month . . . In Defense of Gingerbread


Is it just me? I love gingerbread cookies. I wait all year to make them, bake them once in December and start dreaming about next year.

They are the perfect cookies for all winter long! They're spicy and comforting...you know, I would eat them in a box and I would eat them with a fox. I would eat them in a house and I would eat them with a mouse. I would eat them here and..sorry...


Who's with me? Let me share my favorite gingerbread cookie recipe with you:

Gingerbread Cookies
(modified from Southern Living Incredible Cookies)

1/4 c water
1 & 1/2 tsp baking soda
1 c molasses
1 c butter, softened
1 c sugar
5 c unbleached, all-purpose flour
1/4 tsp coarse salt
1 & 1/2 TBSP ground ginger
1/2 tsp allspice
1 & 1/2 tsp cinnamon

Line baking sheets with parchment.


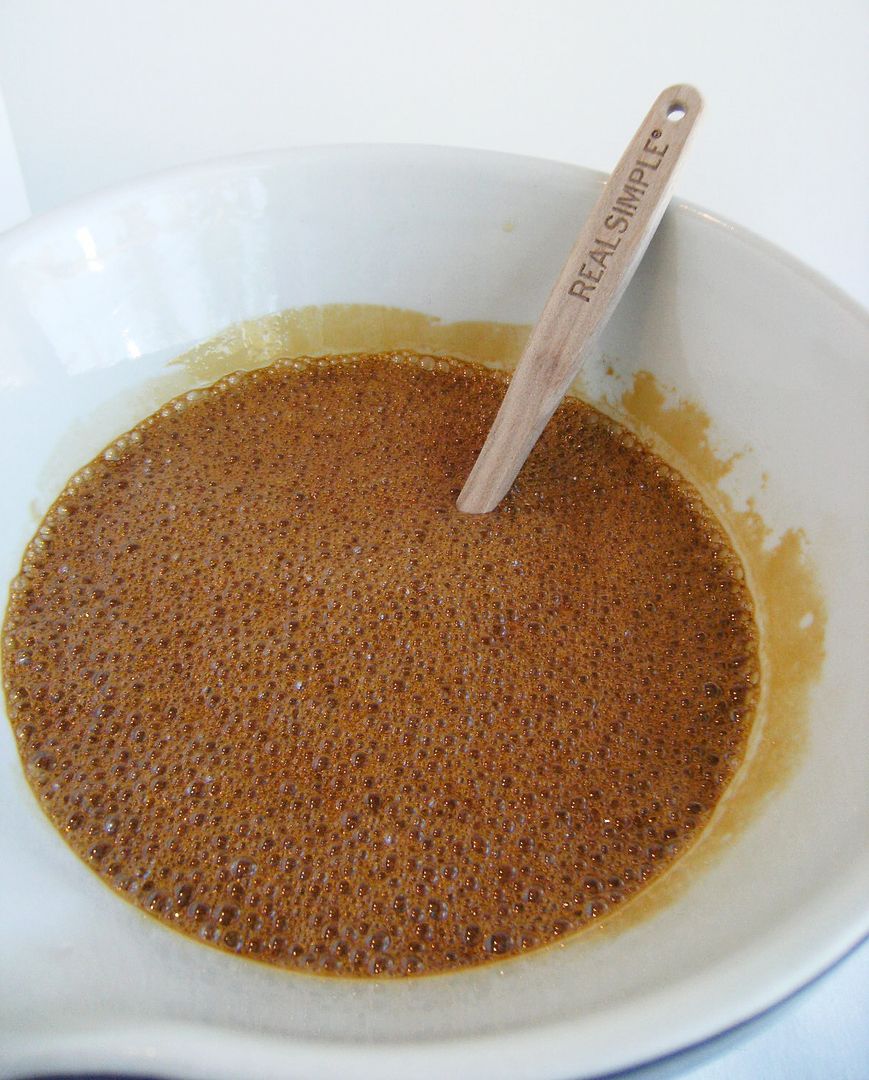
Stir together the water and baking soda until dissolved. Stir in the molasses; set aside.

Beat butter & sugar until fluffy and combined.

Whisk together flour, salt and spices.

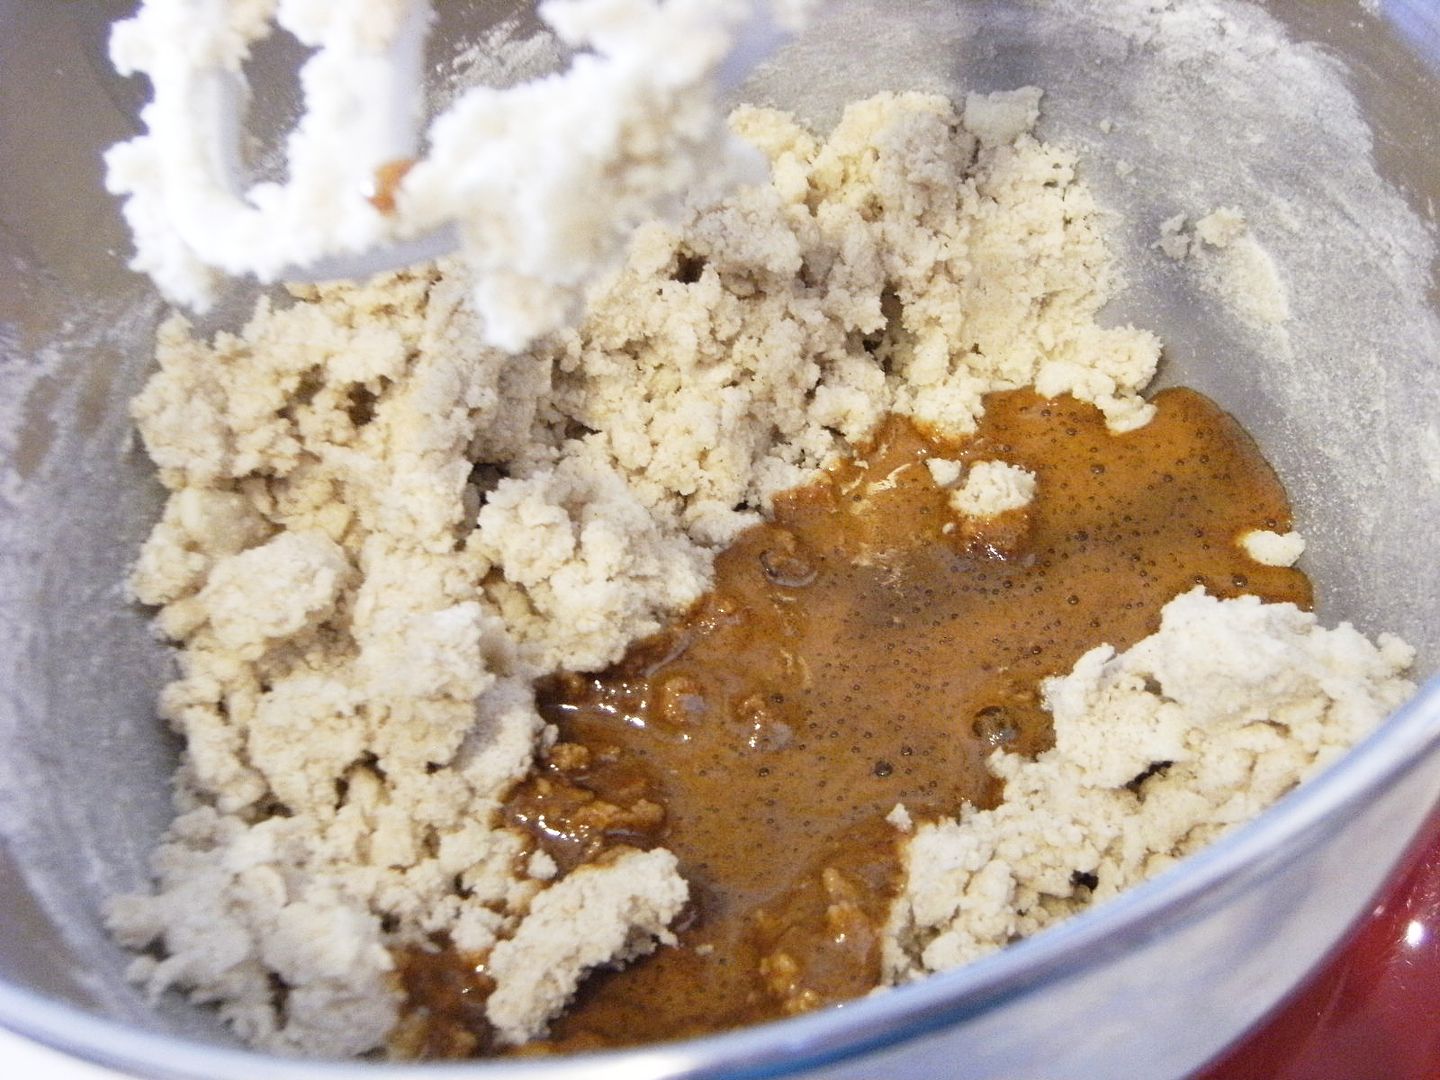
Add to the butter mixture, alternating with the molasses mixture. Begin and end with the flour. Form dough into a ball, wrap in plastic wrap and chill 1 hour.

Preheat oven to 350.


On a lightly floured surface, roll dough to a 1/4 inch thickness. Cut with a floured cookie cutter and place on baking sheet. Freeze for 5 minutes before baking.


{They are going to spread.}
Bake 12 minutes (for a large shape). Cool 1 minute on cookie sheet, then transfer to cooling rack. Cool completely before decorating with royal icing.

To decorate:


  • Using a #2 tip, outline the shape of the snowflake in white royal icing.
  • Thin the icing with water, stirring until it is the consistency of thick syrup. Cover with a damp dish towel and let sit several minutes.
  • Stir gently to pop any bubbles that may have formed and transfer to a squeeze bottle.


  • Fill in the outline using a toothpick to guide into corners.
  • Let dry at least one hour.


  • Again with a #2 tip, pipe a snowflake pattern on each cookie.
  • Let dry overnight.
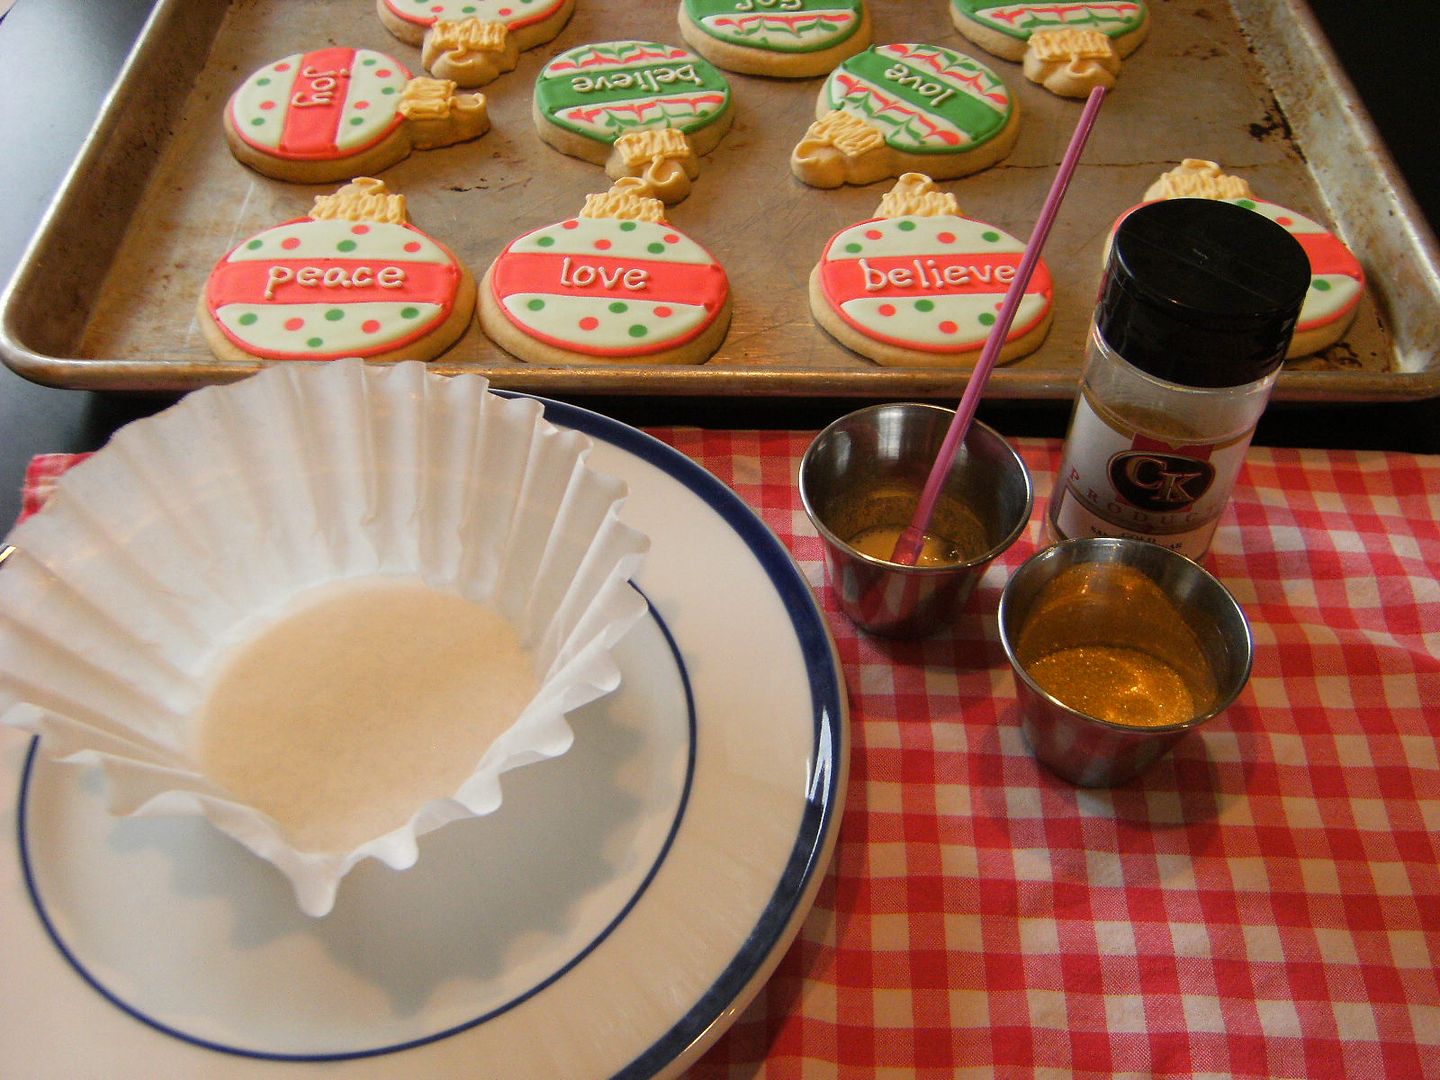
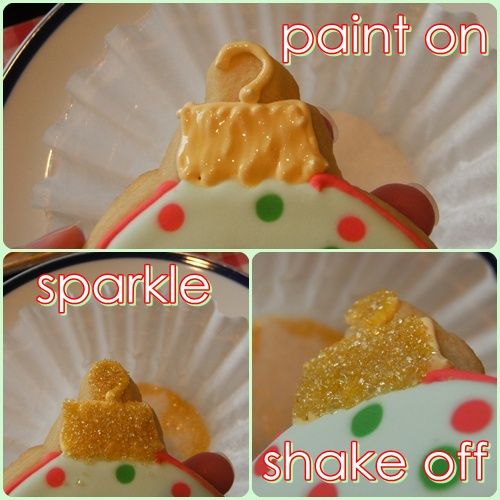
  • Mix a little meringue powder with water. (see sanding station here)
  • With a small paintbrush, paint the mixture on only the snowflake design.
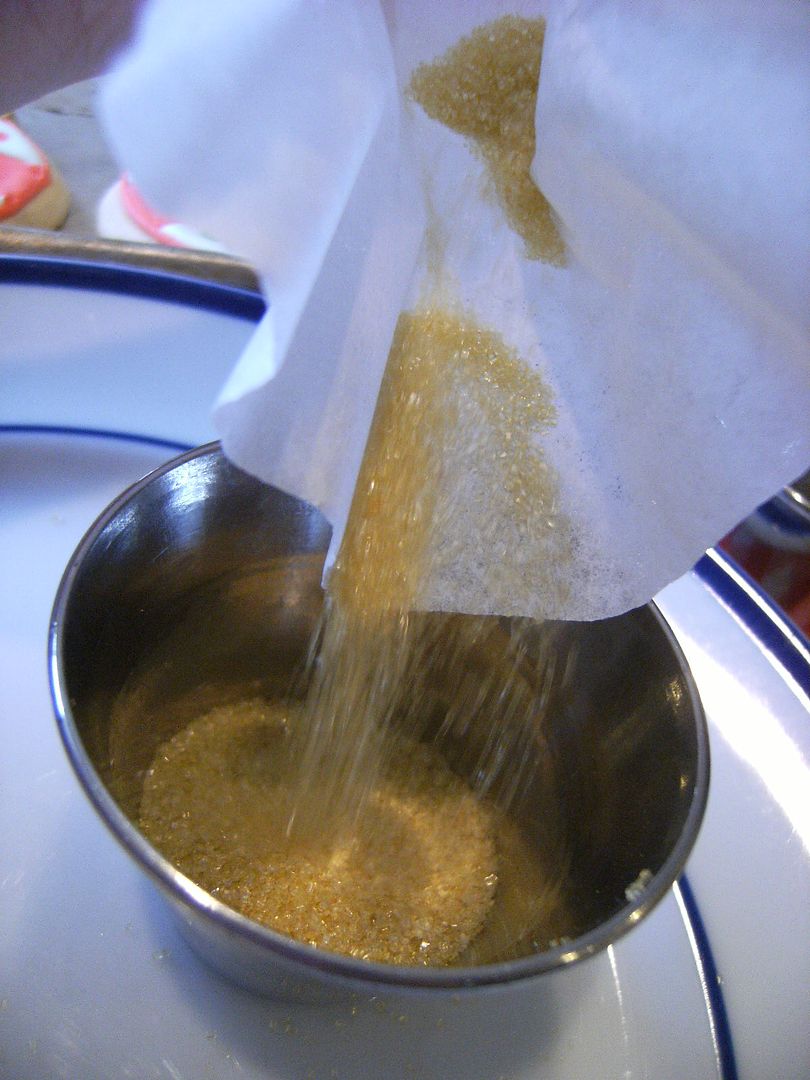
  • Pour on sanding or sparkling sugar and shake of excess.


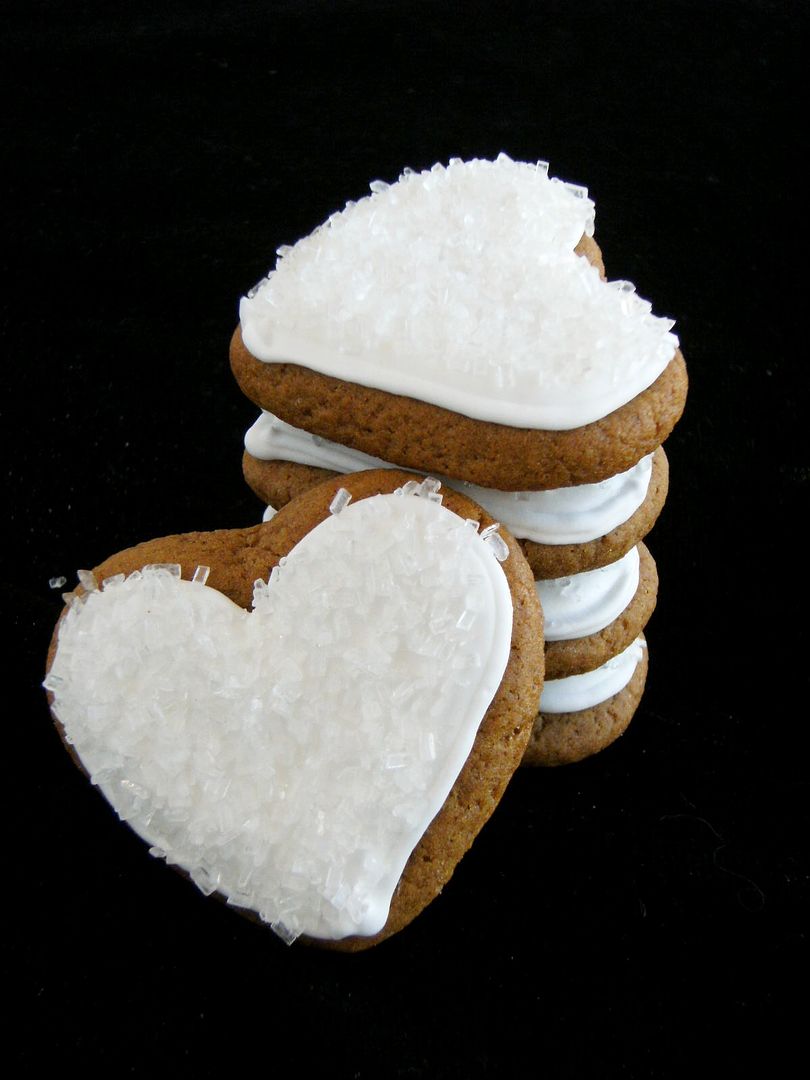
I also made some mini gingerbread hearts...very dangerous, these little bite-size ones!

I'm so looking forward to seeing YOUR cookies!!! Click below to link up. The linky will be closed on January 3rd to prevent spammers.

OH...and there is a new feature here....to add this post (or any) to twitter, stumble upon, facebook, etc, just click on the button at the end of each post. :)

Flavor-of-the-Month January Edition....BOOZY! :) Maybe you make a mean pina colada cake, or Kahlua tart, or a gingerbread martini (!)...link it up the last day of January! EVERYONE is welcome!!!


Princess Cookie Flavoring . . . Works For Me Wednesday

Have you ever eaten a sugar cookie from Potbelly Sandwich Works? They are not decorated sugar cookies, but the soft kind that will bend in the middle, sprinkled with sparkling sugar....buttery, a little citrus-y...really delicious. My sister and I have become a little obsessed with them.

I've been trying to figure out just what their secret is. When I saw this Princess Bakery Emulsion, I thought I might be on to something.

Now, I don't think it's the secret to Potbelly's cookies, and I still like the vanilla-almond flavor of my regular cookies, but it is nice. It adds a certain creamy orange/nutty taste.

Remember these? I used the Princess flavoring in them. My brother-in-law asked if I had done something different with the cookies and said that he really liked them. It gave me great pleasure to tell my Iraq war vet, personal trainer brother-in-law that what he liked was PRINCESS bakery emulsion. :)

So, if you're looking for a new flavor to shake up your sugar cookies, this just might work for you.

And, Potbelly...if you're out there...can you tell us your secret, please?!?
For more WFMW ideas, visit Kristen at We Are THAT Family. My WFMW archives are here.

Papertake Weekly sketch challenge

Happy Tuesday! Welcome to another awesome sketch from the amazingly talented Dawny!! This chickie makes the BEST sketches, and I honestly love to work with her! If you haven't been to visit her blog, then please do yourself a favor and check it out. This week over at Papertake Weekly, we're being sponsored by Simon Says Stamp.

I've had this digital stamp by Mo Manning for forever, and finally am getting the chance to use her. She's colored with Copic markers. I've paired her with some FABULOUS digital sentiments from a new set at The Cutting Cafe' called Because Nice Matters. LOVE this set and I just thought it went so well with this stamp! The inside sentiment is from the same set.


The DP is Basic Grey and the cardstock is Bazzill. The buttons are Basic Grey as well, and the twine is from PTI. That's it for this card. Please join us over at Papertake Weekly and play along. You might win a prize from Simon Says Stamp! Thanks for stopping by to see me today, and hope to see you back again soon! HUGS!

Top Ten Gluten-Free Recipes on Gluten-Free Goddess

Best Gluten-Free Recipes from the Gluten Free Goddess blog
Reader's faves: the top gluten-free recipes on Gluten-Free Goddess blog.


As the first decade of the new millennium chugs to a long slow finish like the spunky little engine that could, top ten lists are sprouting up everywhere. Top ten movies, top ten playlists. Which begs the burning question for celiac survivors. Hello! Where is our own gluten-free top ten list? Where is our shining and sparkly Top Ten Gluten-Free Goodness? It's a new year. A spanking new decade. Let's party.

So without further ado, here is my own humble contribution to the Best of the Best in the expanding gluten-free recipe universe.


Read >>
Hi friends!!! After taking some much needed time off, I am back and definitely in the mood to craft! I hope all of you had a most wonderful holiday season! We had such a lovely Christmas, and I am off work this week. YAY!!!!! LOL! So I'm planning on relaxing and getting some crafting done too. With all the hustle and bustle of the holiday season, I FINALLY got to get my challenge card done for Magnolia-licious. The challenge was from the most talented Cheryl Rowley, and it was to make a shaped card (anything except square or rectangle). I decided to use the card feature from my new Cricut cartridge, Sweet Treats.
I love it, cause the card shape is already made and you just have to tell it what size you want it and hit the cut button. Doesn't get any easier! I also wanted desperately to use this beautiful stamp from Magnolia-licious from the So Jolly/Mistletoe collection. (The site if currently down so I can't link to her, sorry!) She is one of my very favorites from this new collection! She's colored with Copic markers (E50, E53, R35, R46, E11, R20, E02, E00) and then cut out and popped up from the present shaped card. The DP is Basic Grey and cardstock is Bazzill. The tag is cut from my Tags, Bags, Boxes, and More Cricut cartridge. You still have a couple days left to join in on the shaped card fun over at Magnolia-licious Highlites blog! If you play along, you'll have a chance to win a gift certificate to Magnolia-licious! Thanks so much for popping by to see me today, and hope to see you back again soon! Hugs!!

A Bevy of Gluten-Free: Fruit and Vegetables

Photograph of fresh fruits and vegetables at the farmers market in Santa Monica
Jewels at the farmers' market -- naturally gluten-free.


Walking the Santa Monica Farmers' Market beneath dove gray December skies I fell in love with the quiet beauty of seasonal fruits and vegetables protected under netting. There is something so poetic, so archetypal about it. So shy and evocative. Seductive and beckoning. So downright bridal. So understated gorgeous. So rather than waxing all Emily Dickinson on ya and conjuring words for the experience I thought I might use my camera instead.

And let my pictures do the talking.

Karina

Merry Christmas!!!

Merry Christmas from our house to yours!!!

If you all lived closer, here's what I'd bring you....


{I couldn't decide if I wanted fluffy or straight-sided trees...}


{A special thank you to the delightful Janet for the fabulous Cookie Craft book, from which I copied this design almost exactly. :) You are just the sweetest, Janet!}


Have a wonderful holiday week! I hope it's filled with love, laughter and lots of sugar!

Christmas Cookies and a marriage proposal (yay!)


These cookies were involved in a marriage proposal. I'm going to apologize right away because the details are a little sketchy. You see, they come from my husband and he doesn't have the gift of memorizing the minute details of love stories like I do. ♥

You still want to hear about it, though, right?

Here's the deal...I sent hubby (Mr. E) with cookies to give to his friends. He "home" offices, so his "home" is often Starbucks where he's befriended other home-officers. Mr. E gave some cookies to his friend John and a little while later, John's girlfriend Kathy arrived.


John and Kathy (along with the cookies) went to another table. A few minutes later, John announced to the store, "SHE SAID YES!"


{How cute are they?!?!?}

Anyway...somehow John worked the cookies into the proposal. According to Mr. E, John said, something along the lines of, "Would you like to have ornaments like these on a tree of our own?" (See that cookie in his hand?!?)

I strongly suspect the details are a little different from my 3rd hand account, so John, Kathy...care to elaborate?!?

In the meantime, help me wish John & Kathy CONGRATULATIONS, BEST WISHES and HAPPILY EVER AFTER!

A marriage cannot go wrong when it begins with baked goods....I should know my engagement ring was in a loaf of bread. ♥


For details on how to make these cookies, click here!

Chocolate Quinoa Brownies- Gluten-Free and Vegan

These gluten free chocolate brownies are vegan and egg free
Vegan gluten-free brownies made with quinoa flakes.

Your stubborn and chocolate obsessed gluten-free goddess has been working overtime. In between shooting photographs of the holiday lights and skaters in Santa Monica and battling the return of the flu I fought off some weeks ago (I believe in recycling, Darling, but this is a wee bit ridiculous) I have been utterly possessed. Haunted by the ghost of chocolate brownies. Vegan chocolate brownies, to be exact (because I've already served up the best egg-based gluten-free brownie I can think of, so if you haven't tried my Dark Chocolate Brownie recipe or the Chocolate Brownie made with pecan meal, Darling- Go!).

Baking failures do not sit pretty with yours truly. Especially when I am achy and voiceless and my head feels like a giant damp wad of gluten-free dough with too much xanthan gum added (you gluten-free bakers know exactly what I'm talking about). I feel like the goddess of sticky, thick and dull. And there ain't no cure. Except maybe a hot toddy. Or three.

Lucky for me I have a husband who likes to bake. A husband who says (as his brittle, grumpy hot-flashing wife is muttering expletives and scraping another gooey not-in-a-good-way gluten-free vegan brownie failure into the perky polka dotted trash can), So. 

How can we make this work?

For a split second I panic and think, He's over it. He's finally tired of living gluten-free. Living without baguettes and bagels and croissants out of love, a sense of duty, or comradeship and support. 

He's done. Finished. He's out the door, no looking back.

Read >>

Papertake Weekly - Thank you cards

Hi friends!! I sure hope you're done with all of your hustling and bustling, and that you're now able to relax a little and enjoy the holidays! Today over at Papertake Weekly, Dawny is asking us to make a thank you card. I'm hoping you'll need to come up with lots of thank you cards after the holidays! *smile* For this one, I used one of the brand new Tildas from the winter club kit. I have no idea even what her name is yet, but I think she's as cute as a button! Watch for her at Magnolia-licious. I'm sure Diana will have her up for preorder soon.

I paired her up with some awesome paper from Graphic 45 and Bazzill cardstock. She's colored with Copic markers and then cut out and double popped for dimension. The word circle is a fantasic digital stamp from The Cutting Cafe and it's a $.99 cent special!!! I love the font on it! Please join us at PTW with your Thank You cards and maybe you'll get lucky and win!! Good luck!
I think this is probably the last post you'll be seeing from me before Christmas. So I'd like to take a moment to wish each of you and your families a very Merry Christmas and a safe, happy, and healthy New Year! I so appreciate your visits and support over the past year. You are appreciated more than you will ever know. God bless you and your families, and Merry Christmas!!!! Lots of love!

Personalized Christmas Ornament Cookies (a how-to)


Are you finished with your Christmas baking? Are you like me and smack dab in the middle, with a kitchen covered in a layer of flour, which should be cleaned, but the lure of the computer and blogging is just too strong? *sigh*


Tomorrow I'll share with you MORE Christmas ornament cookies...some that were (unbeknownst to me) actually used in a marriage proposal (!), but today, let's make personalized ornaments.


This one happens to be my favorite because Phyllis is my favorite character on The Young & The Restless. (Is that more than you wanted to know about me?)


To make them:
  • With gold icing and a #2 tip, make the hanger and top of the ornament. (AmeriColor Gold mixed with Egg Yellow)

  • With a #2 or #3 tip, pipe the outline of the ornament and two lines across the center. (AmeriColor Leaf Green)
  • Thin green, mint and red icings with water (by hand) to the consistency of syrup. Cover with a damp dishtowel and let sit several minutes.
  • Stir gently with a rubber spatula and transfer to squeeze bottles.
  • Fill in the center section with green icing.

  • Fill in the top and bottom areas in mint icing, work about 6-8 cookies at a time. (AmeriColor Leaf Green)

  • {Remember the colors will darken up and these were taken at night. It kills me a little inside every time I post these dark pictures!}
  • Go back over the 6-8 cookies, adding a line of green and red (AmeriColor Super Red) thinned icing right on top of the wet mint icing.

  • Drag a toothpick up and down the icing, through the stripes creating a zig-zag look.
  • Let the cookies dry at least 1 hour.
  • With a #1 tip, add the names in white royal icing.
  • Let dry overnight.
To add the sparkling sugar:

This is how I set up my sparkling sugar station....

  1. coffee filter for catching extra sprinkles,
  2. mixture of meringue powder and water,
  3. small container for the sanding sugar,
  4. child's paintbrush,
  5. paper towel (or dish towel)

Paint the meringue powder and water mixture where you'd like the sparkles. Shake on the sparkling/sanding sugar. Shake off the excess onto the coffee filter.


Use the coffee filter as a funnel to use again.


OK...I'll see you guys tomorrow with the marriage proposal cookies!!! In the meantime, here's a link to blue and red ornament cookies from last year. Happy baking!
 
design by 100 HOTTEST CELEBRITY COUPLES OF 2011