WOOHOO! Happy Friday! And that means that it's time for a new challenge over at Wags 'n Whiskers! This week, the challenge is brought to us by the lovely and very talented Michele (You've GOT to check out her hand made flowers!!) Michele's challenge is vintage/shabby chic. For my card, I chose to use this adorable fairy called Hannah. She's colored with ProMarkers and then cut out and popped up. The flourishes and doily are Doohickey dies by Magnolia from Magnolia-licious. Bow is made from May Arts silk ribbon.  Please be sure and visit the rest of my sister Divas to see their gorgeous creations, and then we'd love it if you'd join us in the challenge. But remember, you must use a Wags 'n Whiskers image to win!


Thanks so much for stopping by to see me today, and hope to see you back again soon!  Hugs!

How 'bout THEM apples?!?

I volunteered to make cookies for a teacher appreciate dinner last week and since it was September, and the beginning of the school year, I had apples on the brain.

These apples are inspired by my friend, Jennifer, a FABULOUS cookie decorator who makes cookies for Frost Bake Shoppe.  This summer, she made these cute little sun cookies...aren't they darling?!?  Well, I thought my apples needed smiles as well.


{One note on these...the dots are just a lighter red, but next time I make them, I'll make the dots a bit darker....I think the eyes blend in a little too much with them. And wouldn't green apples be fun, too?}

To make them, you'll need:
 
    Using a #3 tip, outline the cookie (apple & leaf) in black icing (I STRONGLY recommend AmeriColor Super Black).  Pipe the stem.

    Because of the black outline, you may want to let the outline set for a bit longer than normal.  One hour should be fine.

    Thin the red and light red icings with water, a bit at a time, until it is the consistency of thick syrup.  Cover with a damp dish towel and let sit several minutes.

    Stir gently with a rubber spatula and transfer both icings to squeeze bottles.

    Working 6-8 cookies at a time, fill in the apples in red, using a toothpick to guide to edges.

    Go back over the same 6-8 cookies and drop dots of the lighter red icing.
    Let stand at least one hour.

    With the #4 tip, pipe eyes on the apples with white icing.

    Using a #2 tip, add the pupils to the eyes and a smile. :)

    With another #2 tip, fill in the leaf.

    Let dry overnight.

    You know what they say...
    "An Apple a Day Keeps the Skinny Jeans Away." 
    Or something like that.

    Tidy Mom I'm Lovin It Fridays

    Gluten-Free Crisp Recipe: Cranberry Peach Crumble

    Gluten free cranberry peach crisp crumble recipe
    Gluten-free cranberry peach crumble. Easy as pie. Wait. Easier.


    So I have a question for you. Albeit, rhetorical. Who doesn't love a warm-from-the-oven fruit crisp or crumble? Personally, I'm a big fan. Obviously. Here's why. Imagine tender, juicy melt-in-your mouth bites of sweet fruit. A kiss of brown sugar. A hint of cinnamon.

    And Darling- best of all? Embarrassingly easy.

    Read >>

    Delightful Challenges - purple, green, and black color challenge!


    Hi everyone! It's almost Friday! YAY! And since it's Thursday, that means it's time for a new challenge from Delightful Challenges!  We are sponsored this week by Kut 4 U.  Our challenge is to use the colors purple, green, and black. I threw a few other colors in there, but for the majority of the card, those are definitely my main colors. I used Frankie Ridley along with the haunted house from the Halloween Accessory Set.

    The fence is cut with my Cricut Expression from the Paper Dolls cartridge. I honestly can't remember if it was Everyday or Dress Up. See what happens when you use the Gypsy and don't have to dig out all those cartridges anymore? LOL! Anyway, I curved the fence out from the card, so they're attached to the card on both sides, and then curved out through the center of the fence.  Please be sure to visit Delightful Challenges to see what the rest of my talented DT sisters came up with for this challenge. And don't forget to hop over HERE to see the Digital Delights DT have come up with for today as well. Thanks for stopping by to see me today and hope to see you back again soon! Hugs!

    Brownie Batter Ice Cream ( and a giveaway! )


    Have you heard of Naturally Nora?  Naturally Nora is a line of baking mixes, such as cake, frosting and brownie, that is all-natural with no artificial colors, flavors or preservatives. What's more? They're really yummy!

    Naturally Nora sent me a (big!) box of their goodies and wants to send one to a Bake at 350 reader, too!

    {There is something very exciting about a box full of baking mixes arriving on your doorstep!}

    I love to bake from scratch, but I'm not opposed to using a boxed mix....sometimes I need a little help!

    So far, we've made Chocolate Chunk Brownies (no picture as we ate them all too fast), cupcakes from the ALot'a Dots cake and frosting mix and Brownie Batter ice cream from the regular brownie mix.  I think I'm using the next box of cake mix & frosting to make Pumpkin Spice Cake Truffles!

    Everything has been delicious!  And my boys went ga-ga over this ice cream!
    Brownie Batter Ice Cream
    {modified from Ben & Jerry's Homemade Ice Cream Book 's French Vanilla}

    1 tsp. vanilla
    1/2 tsp. instant espresso powder
    2 eggs (pasteurized if you'd like)
    3/4 c. sugar
    2 c. heavy cream
    1 c. milk
    1 c. brownie mix

    Combine the vanilla and espresso powder, set aside.

    Whisk the eggs 1-2 minutes until light and fluffy.  Add the sugar a little at a time, whisking until completely blended.  Once all the sugar is added, whisk for 1 minute more. 
    Add in the cream, milk, vanilla/espresso and brownie mix.  Whisk until smooth. 

    At this point, the mixture can be refrigerated until ready to use or transferred to an ice cream maker.  Follow the manufacturer's instructions for freezing.


    To enter the giveaway for a box of goodies from Naturally Nora:
    • visit Naturally Nora and leave a comment here with the mix you'd most like to try,
    • for an EXTRA entry, tweet about the giveaway and leave a separate comment letting me know that you did: " Win a goodie box of Naturally Nora all-natural baking mixes from @bakeat350tweets http://ow.ly/2L8xP! "
    A winner will be randomly chosen October 3rd at 8pm CST.  Good luck & happy baking! :)

      PTW - Sketch Week

      Happy Tuesday everyone! I hope you're having a fabulous week! It's time for a new Papertake Weekly challenge, and this week it's one of Dawny's awesome sketches. This week we're being sponsored by the fabulous Simon Says Stamp. I decided to feature this adorable cutie pie, #3024 Tilda in petticoat, colored with Copic markers. She's available from Diana at Magnolia-licious.


      The cardstock is Bazzill cardstock and the PP are from Nitwits (LOVE these fall papers!!). The bow is made from May Arts silk ribbon and the buttons are just from my stash threaded with embroidery thread. Lots of machine stitching on this one, too. Please be sure to visit Papertake Weekly so you can feast your eyes on the fabulous creations from the rest of the design team. Then we'd love it if you grab your paper and glue and join us in the challenge! You could win a fabulous prize from Simon Says Stamp! Thanks for stopping by to see me today, and hope to see you back again soon! Hugs!

      Gluten-Free Coconut Flour Apple Cake Recipe

      Gluten free apple cake recipe made with coconut flour
      A lovely gluten-free apple cake with coconut flour.

      The weather here has hula-hooped back into summer. I kid you not. It is ninety-seven degrees here in Little Russia, my West Hollywood neighborhood. As in 97. That's three shy of one hundred, Bubbe. In September. And what am I doing? Baking a cake. Heating up the kitchen. It figures.


      Read >>

      Spa Sweets : Chocolate Banana Muffins

      What's the first thing you think of when you think of going to a spa?  Food, right?
      I know, it's strange, but when I think of spas, my mind wanders to thoughts of "spa cuisine" (especially if it involves the HERSHEY SPA)!

      So, when Chevy sent a friend and me to the spa for 1-hour massages, my mind naturally went to Chocolate Banana Muffins.  Lori from Recipe Girl (love!) featured a recipe from The Rancho La Puerta Cookbook , Chocolate Banana Bread last year and it's delicious!

      I changed it up just a bit and made Chocolate Banana Muffins.  They may just be the unhealthiest, healthy muffins you've ever eaten.  No added sugar...except for the chocolate chips and banana chips, and well, the sprinkling of sugar on top.

      They also have a secret ingredient: PRUNES!

      Spa Chocolate Banana Muffins
      {adapted from Recipe Girl &The Rancho La Puerta Cookbook }

      10 oz. pitted dried prunes
      2 c. water
      1 c. minus 1 TBSP all-purpose (or WHITE whole wheat) flour
      1/2 c. dutch-process cocoa powder
      2 tsp. baking powder
      2 tsp. cinnamon
      1 and 1/2 tsp. baking soda
      3/4 c. mashed ripe banana (about 2 bananas)
      2 eggs
      1/2 c. chocolate-covered banana chips (or reg. banana chips)
      1 c. bittersweet chocolate chips (Ghiradelli)
      sparkling or sanding sugar (optional)

      Combine the prunes and water in a small saucepan.  Bring to a boil over high heat.  Reduce to a simmer  and cook for 20 minutes.  Drain.

      Meanwhile, preheat the oven to 350.  Butter 12 cups of a muffin tin.  If you are really paranoid like me, line the bottoms of the muffin cups with a small circle of parchment paper.

      In a large bowl, whisk flour, cocoa powder, baking powder, cinnamon and baking soda.  Set aside.

      Process the prunes and bananas in a food processor until smooth.  Add eggs and process until combined.

      Stir the prune mixture into the flour until combined. Add in the banana chips and chocolate chips.  Spoon into prepared muffin cups.  Sprinkle with sparkling sugar.

      Bake 16-20 minutes until the tops bounce back when lightly pressed.  Cool on a cooling rack 10 minutes. Remove from pan and let cool completely.  Enjoy!


      {And thank you, Chevy, for the massage!  If you live in the Houston area, be sure to check Gotta Love Chevy for a chance to win a new designer handbag AND a girlfriends getaway to Ojai, CA!}

      Hanglar and Stanglar thank you card using ProMarkers and Blog Candy Winner!!


      Happy Saturday everyone! Hope you're enjoying your weekend! I know I sure am! I slept LATE today! I'm still trying to get rid of the last of this yucky cold, so I guess I needed it. I need to get a bunch of thank you cards done, so this is the start of them. Expect to see a few more. LOL! This one uses a cute Hanglar and Stanglar image, and this time she's colored with my Letraset ProMarkers! Isn't she adorable? The colors of the Promarkers are truly, truly beautiful! They have such a "soft" feeling to many of them. And they blend beautifully too! I really like the way she turned out. I also printed out the circle sentiment from my computer and colored the font with the same color as her outfit.


      Cardstock is Bazzill, DP is Basic Grey, flowers are from Wild Orchid Crafts, and the lacy strip was made with a Martha Stewart punch and Bazzill cardstock. Ribbon is from Stamp and Create. Thanks so much for stopping by to see me today, and hope to see you back again soon! Hugs!

      Almost forgot to pull the blog candy winner for the Magnolia-liciou Blog Hop! So without further ado...here we go..... drum roll please.........


      Another early bird!!! And the winner is.....


      Congrats Kate!! Please email me your address and I'll get your Tilda and bat stamp in the mail! Thanks to everyone for playing along! Hugs!

      Peggy Loves Vintage - Yuletide Log


      LOL! I think this guy has really been enjoying the Holiday season!! Isn't this image so fun? It's from a brand new cd at Peggy Loves Vintage,  Christmas Volume 13. It is jam packed with fabulous Christmas images that makes sending a hand made card easier than ever before! I simply printed this off and matted it! That's it!  Please visit Peggy Loves Vintage to see the rest of the fantastic images on this brand new cd! Thanks for stopping by to see me today, and hope to see you back again soon! Have a fantastic weekend! hugs!

      Lucy in the Sky with . . . Polka Dots

      Usually when I use my icing printer, I format the image to the size I want before printing.  I decided to play around with something new and print out a patterned page frosting sheet and cut it to fit my cutters.

      Some of you have asked....my printer is an Epson WorkForce 30 Color Printer ; it is compatible with the food coloring cartridges.  You can find a list of all the compatible printers from KopyKake.  The printer itself is pretty affordable; it's the ink that is expensive....$90 for the set.  {That's why it took me so long to order one!  It was a major dent in my Starbucks fund.}

      First, I ordered some digital paper from etsy.  Oh my gosh, there are SO many cute designs available!  I think I now have 100 digital papers in my arsenal.

      {The smart thing would have been to TRY my idea before buying all of them, but I got a little carried away.}

      Second, I printed the image on a full sheet of icing paper.

      Third, using a food coloring pen, I traced the cookie cutters I used and then cut the icing sheets.
      Forth, the cookies were outlined and filled with white royal icing.  While the flood icing was still wet, I applied the icing sheet.  It's not a perfect fit, so....

      Fifth, after the cookies were dry, I went over the borders and added piping.

      Do I love my icing printer?  Yes.  

      But here's my problem with it...and maybe somebody can help me. 
      The original image was this:

      It looks so different on the cookies.
      But, when I made these cookies, the colors stayed pretty true.  I'm so confused.


      Tidy Mom I'm Lovin It Fridays

      Anyone have experience with this they'd like to share?

      Gluten-Free Pumpkin Pie Bread

      Vegan pumpkin pie bread - gluten-free
      A moist and tender tea bread that tastes like pumpkin pie.


      Happy Fall! Here's a weekend recipe from the archives- a moist, gluten-free pumpkin bread you can bake in a bread machine- or your oven.

      This is a big week. Huge. Never mind The Canyon premiere. Forget the post screening parties at Cafe Was and the Palihouse (where the valet parked the only Honda Fit of the night- I'm guessing). Forget hanging out in Hollywood with Yvonne Strahovski. Mark Williams. We're talking major excitement. Glamor. Dreams come true. That's right.

      We're unpacking our relocation cube.

      But wait. There is more to the story, truth be told. There is a subplot with a third act twist. There is, um. Titillation. Desire. Longing. By your intrepid Goddess. No, Babycakes. Not longing for fame. Or glitz. Or girly-girl anything. I'm not that kind of Goddess (Botox and bling isn't on my radar). Nope.

      So what is this obscure object of desire?


      Read >>

      Wags 'n Whiskers - Diamonds and Pearls


      WooHoo!! Happy Friday everyone!! It's time for a new Wags 'n Whiskers challenge, and this weeks challenge is Diamonds and Pearls from the lovely and talented Emma. I chose to use this gorgeous image called "Say a Prayer", and I just adore her for those really special cards when someone is having a tough time.  She's colored with Copic markers and cut out and popped up off the Nestabilities circle.


      You might think I cheated a little bit cause the "diamond" part of my card is the Diamond Stickles I used on her wings. :0)  And of course I used Kaiser half backed pearls, some pretty lace and May Arts silk ribbon for the bow. cardstock is Bazzill and printed paper is digital from Bearly Mine. The seniment is just computer generated. Copics used are listed below. We'd love it if you joined us in the challenge over at Wags 'n Whiskers, but remember you must use a Wags 'n Whiskers image in order to win! Also, please be sure to visit my sister Divas blogs to see their amazing creations with Diamonds and Pearls!


      Copics:  dress B0000, 91, and 95   skin: E11 and 00,  hair: E97, 99, and 17;  around the white W1 and 2

      Thanks for stopping by to see me today and hope to see you back again soon! hugs!

      "So, just how long is it going to take me to make and decorate cookies?"

      works for me wednesday at we are that family
      "So, just how long is it going to take me to make and decorate cookies?"   The short answer is...it depends.  It depends on how many you're making, of course, and how many colors of icing you are using, and how detailed the cookie design is, and how you are packaging them. Whew.

      But, let me try to give you a rough idea. Let's go with 2 batches of cookies because if you're going to take the time to make them, you might as well make more than one.
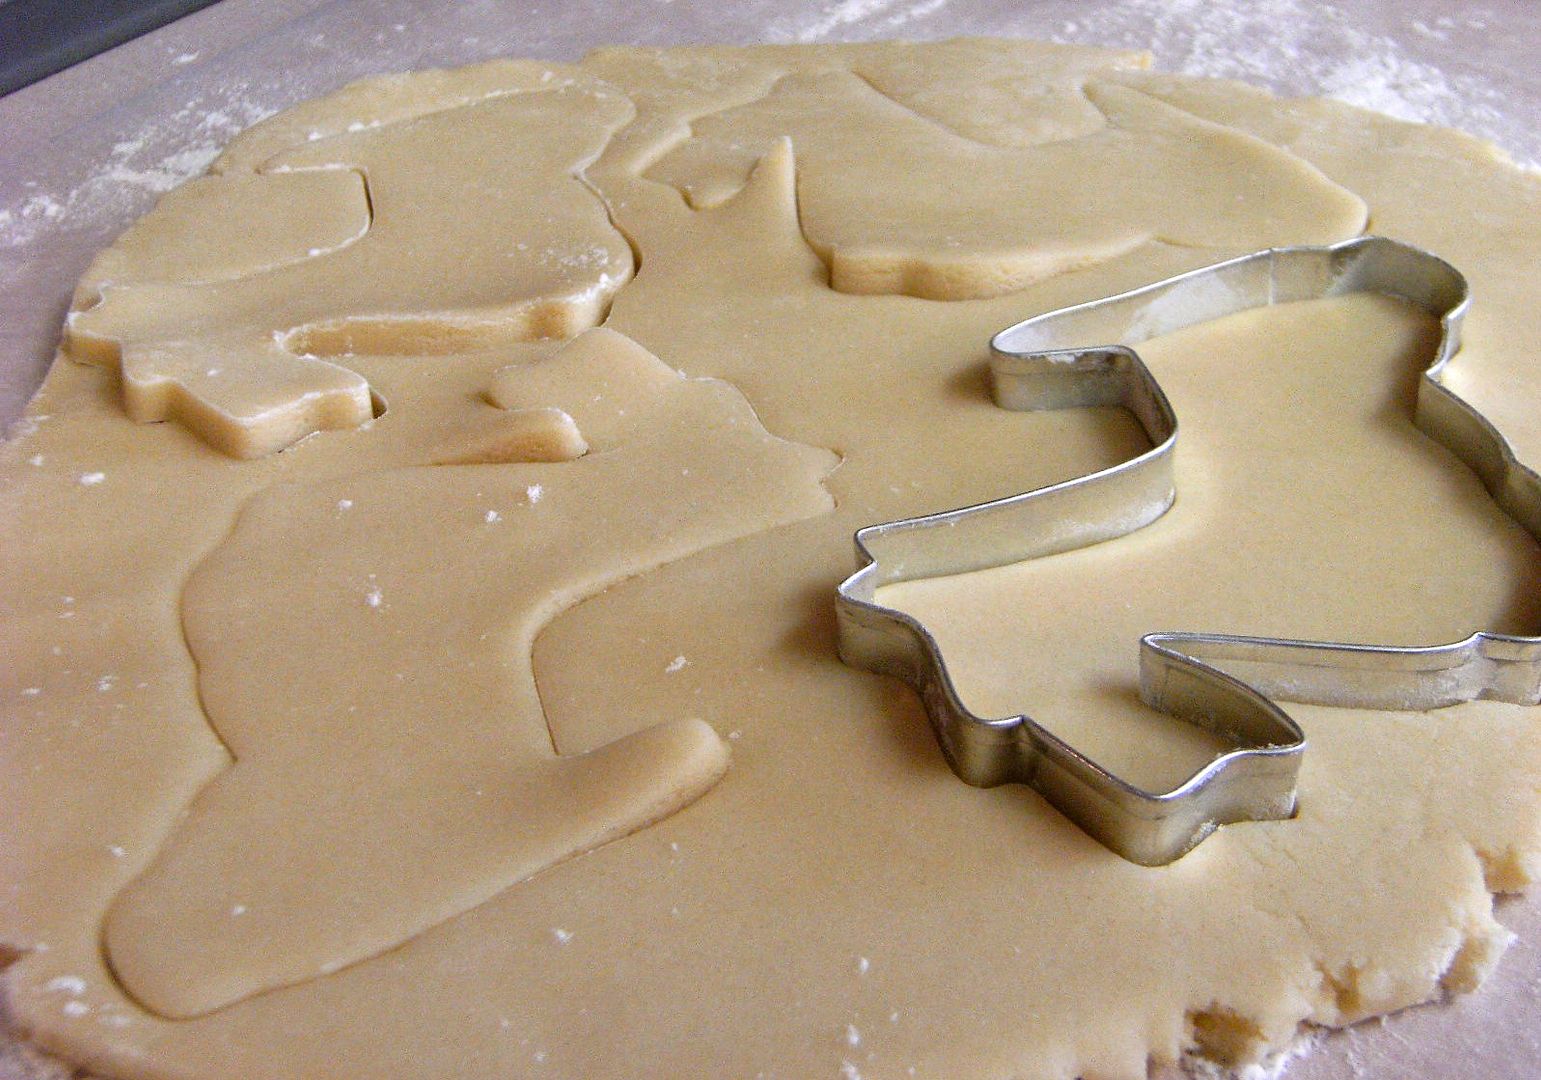
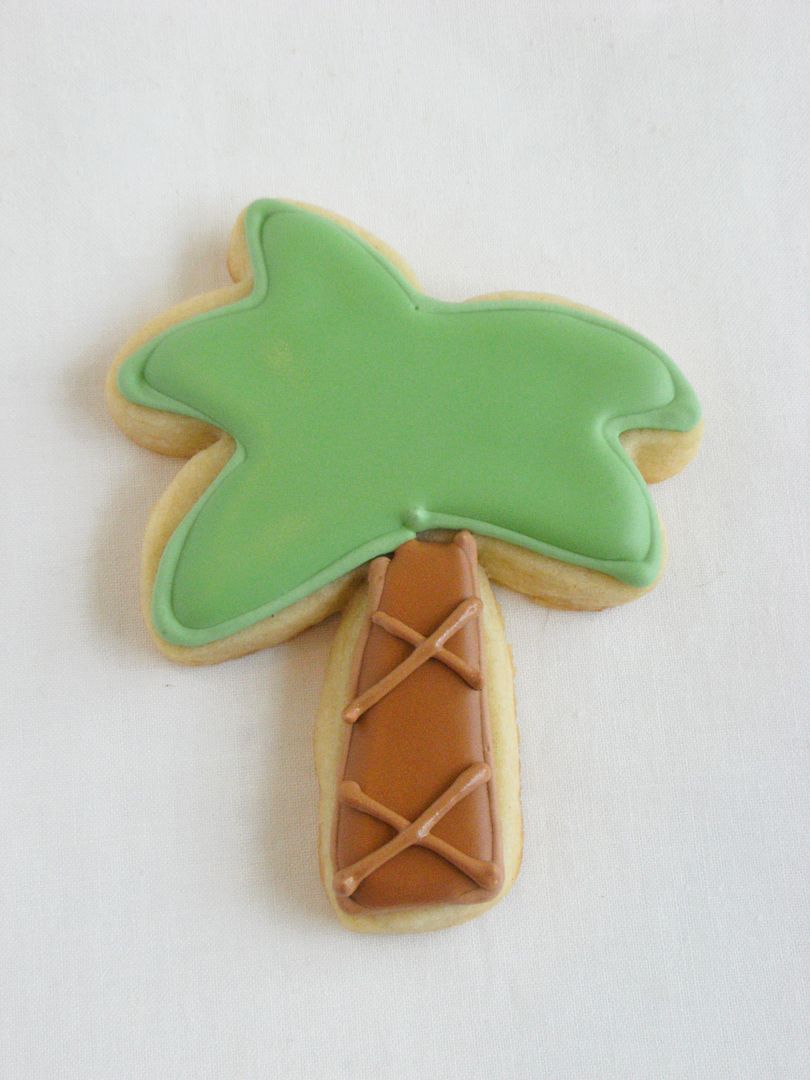
      First, the cookies.  Using this cookie dough recipe, plan on about 1 hour per batch.  With a 4.5" cookie cutter, you'll have around 12 cookies.  I bake mine 6 at a time, since I have a single oven.  I could do 2 sheets and rotate the them during baking, but I am usually too distracted by twitter getting in some housework (ha!) and forget to rotate.

      Cookies (two batches)....2 hours
      Cookies (cool completely)...1 hour

      Next, the icing.  I use royal icing.  It's just as quick to make a double batch as it is to make a single.  I usually double my recipe just to ensure I have enough.  To make the icing and tint it, assuming you're making more than 2 colors, takes about 45 minutes.
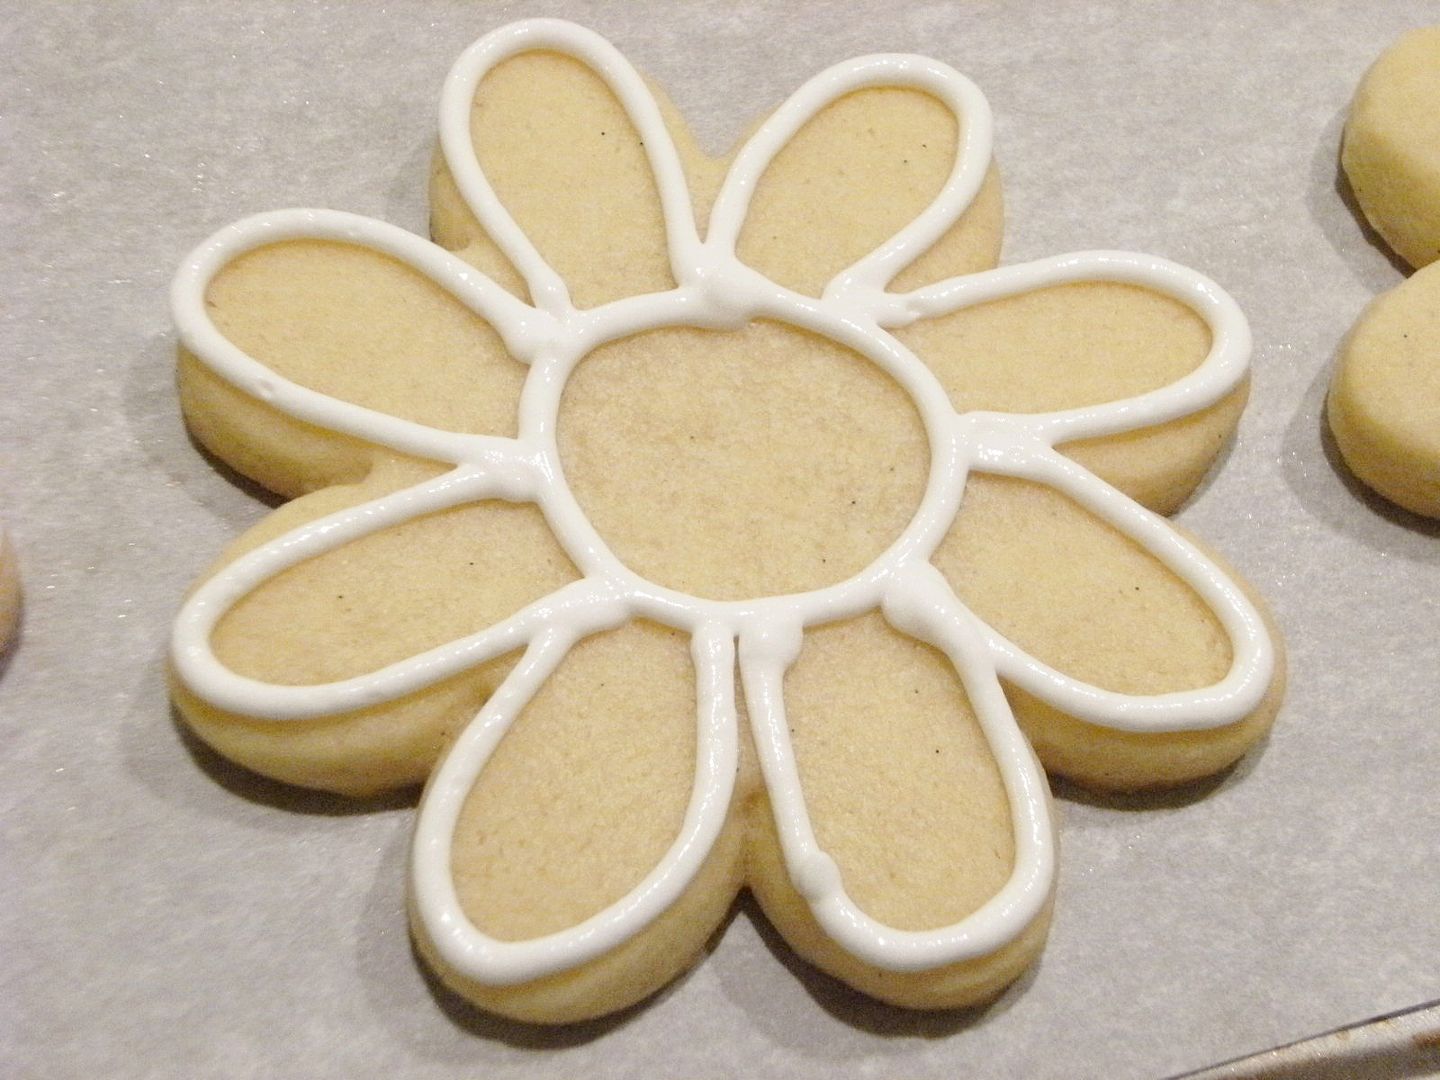
      Icing....45 minutes

      Decorating the cookies. This is a little difficult to estimate and you'll have some down time here.  Assuming you have 24-30 cookies, you'll need to prep your icing bag and outline your cookies.  For a simple outline, allow 30 minutes.

      Outlining....30 minutes

      Next, you'll want to 
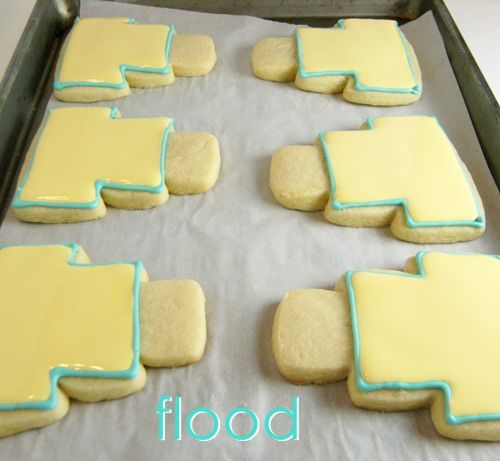
"flood" the cookies with thinned icing.  For me, thinning takes a while because I add water just a bit at a time.  You'll need to thin the icing, let it sit, stir, then flood.

      Flood icing (thin)....15 minutes
      Flood Icing (rest)....10 minutes
      Flood icing (fill)......45 minutes

      Usually, you'll have some sort of detail to add to the cookies.  First, the filled cookies need to "rest" for an hour or so before the next step.


      Rest....1 hour

      Finally, the detail work.  You may be adding sanding sugar, sprinkles, luster dust, extra piping, or all of the above, so this really varies.  Assuming the detail is a bit of simple piping on each cookie, allow at least a minute per cookie.

      Detail.....30 minutes

      Then, let them dry overnight.

      Dry.....overnight

      ***This does NOT include clean-up time!***

      So, for about 2 dozen, simply decorated cookies, I would allow 5 hours of baking/decorating with 2 hours and 10 minutes plus overnight of inactive/rest time. (Did I add that right?) But, remember, it depends! :) 

      {In other words, don't start a cookie decorating project at 8pm the night before you need them.}

      My advice....make the cookies a day ahead.  Even two days.  Even more than that and freeze them.  Yes, they freeze...even fully decorated.

      Another hint, royal icing can be made ahead of time, too.  The icing will not be as stiff the next day, so if you have fine detail work to do, you may want to make it the same day.  Otherwise, it's fine.

      I love this post from my friend Gail of One Tough Cookie...here's a little nugget of wisdom from her blog: "No matter how much time you allow for decorating the cookies, allow more."    See, she's smart and CRAZY TALENTED!

      That's what works for me.  Do you have any hints for timing your cookie decorating?
       
      design by 100 HOTTEST CELEBRITY COUPLES OF 2011